Here’s a video of this setup in action. I set the screensaver timer to 3 seconds just for the video:
I have been wanting to setup a home control panel for a while now. I even bought an RPi 3 with the 7 inch touch screen. But i learned that it was just too slow and the OS just isn’t designed for a touch interface. For example, having a keyboard pop up when a text field is in focus is not an easy task. Home Assistant’s interface was super slow as well. I ended up abandoning that idea.
Recently, Amazon was selling the refurbished Fire 7 tablet for less than $40. The new one runs for juts $10 more. So I figured I would order it and see if it would be an option. After spending an hour with it, I felt confident that I can make it work. I’ve been running it for a couple weeks at the time of writing, and it’s been awesome.
Power and Mounting
Here is a list of the parts that I used for power:
- Single Gang Low Voltage Mounting Bracket ( I used an orange double gang, but as I explain below, I would recommend a single gang bracket. And of course black will blend in better than what I have). You might not even need this if you can just punch a small hole in the wall for the wire.
- MicroUSB cable/Charger
- Universal Qi Receiver
- 3m Command Strips
The toughest part of this process was getting the Fire connected to power. I already had it all setup from when I had the Pi set up on the wall, but it wasn’t a simple task.
I was lucky that on the other side of that wall was a coat closet. And I had already installed a light switch/light in there a few years back. So all I had to do replace the switch with a switch/outlet combo. Then I plugged in the power and pushed the microUSB connector through a small hole in the wall next to the switch/outlet. On the other side of the wall, I had put in a double gang low voltage bracket which the Pi covered perfectly. I needed a double gang so I can fit the Pi through it. For the Kindle a single gang bracket or even just a tiny hole for the wire would be more than enough.
For mounting the Pi, there are many options, but I just when with the 3m command strips. It looks clean and it’s low profile.
The next challenge was finding a way to have a cable plugged into the Fire without it sticking out. I decided to go with a universal Qi charger. I then opened it up and took off the actual Qi circuit. I just needed the low profile microUSB connector and the 2 wires coming off it. I soldered those wires onto a USB cable.
The Qi Receiver wire has the 5v pin and the Ground pin marked. And when you cut open your MicroUSB cable, the red wire should be 5v and the black wire should be ground. So just solder the appropriate wire to the appropriate lead on the Qi cable. In the last picture above, it’s the little gold piece that is next to the power button. It sticks out just a hair more than the power button.
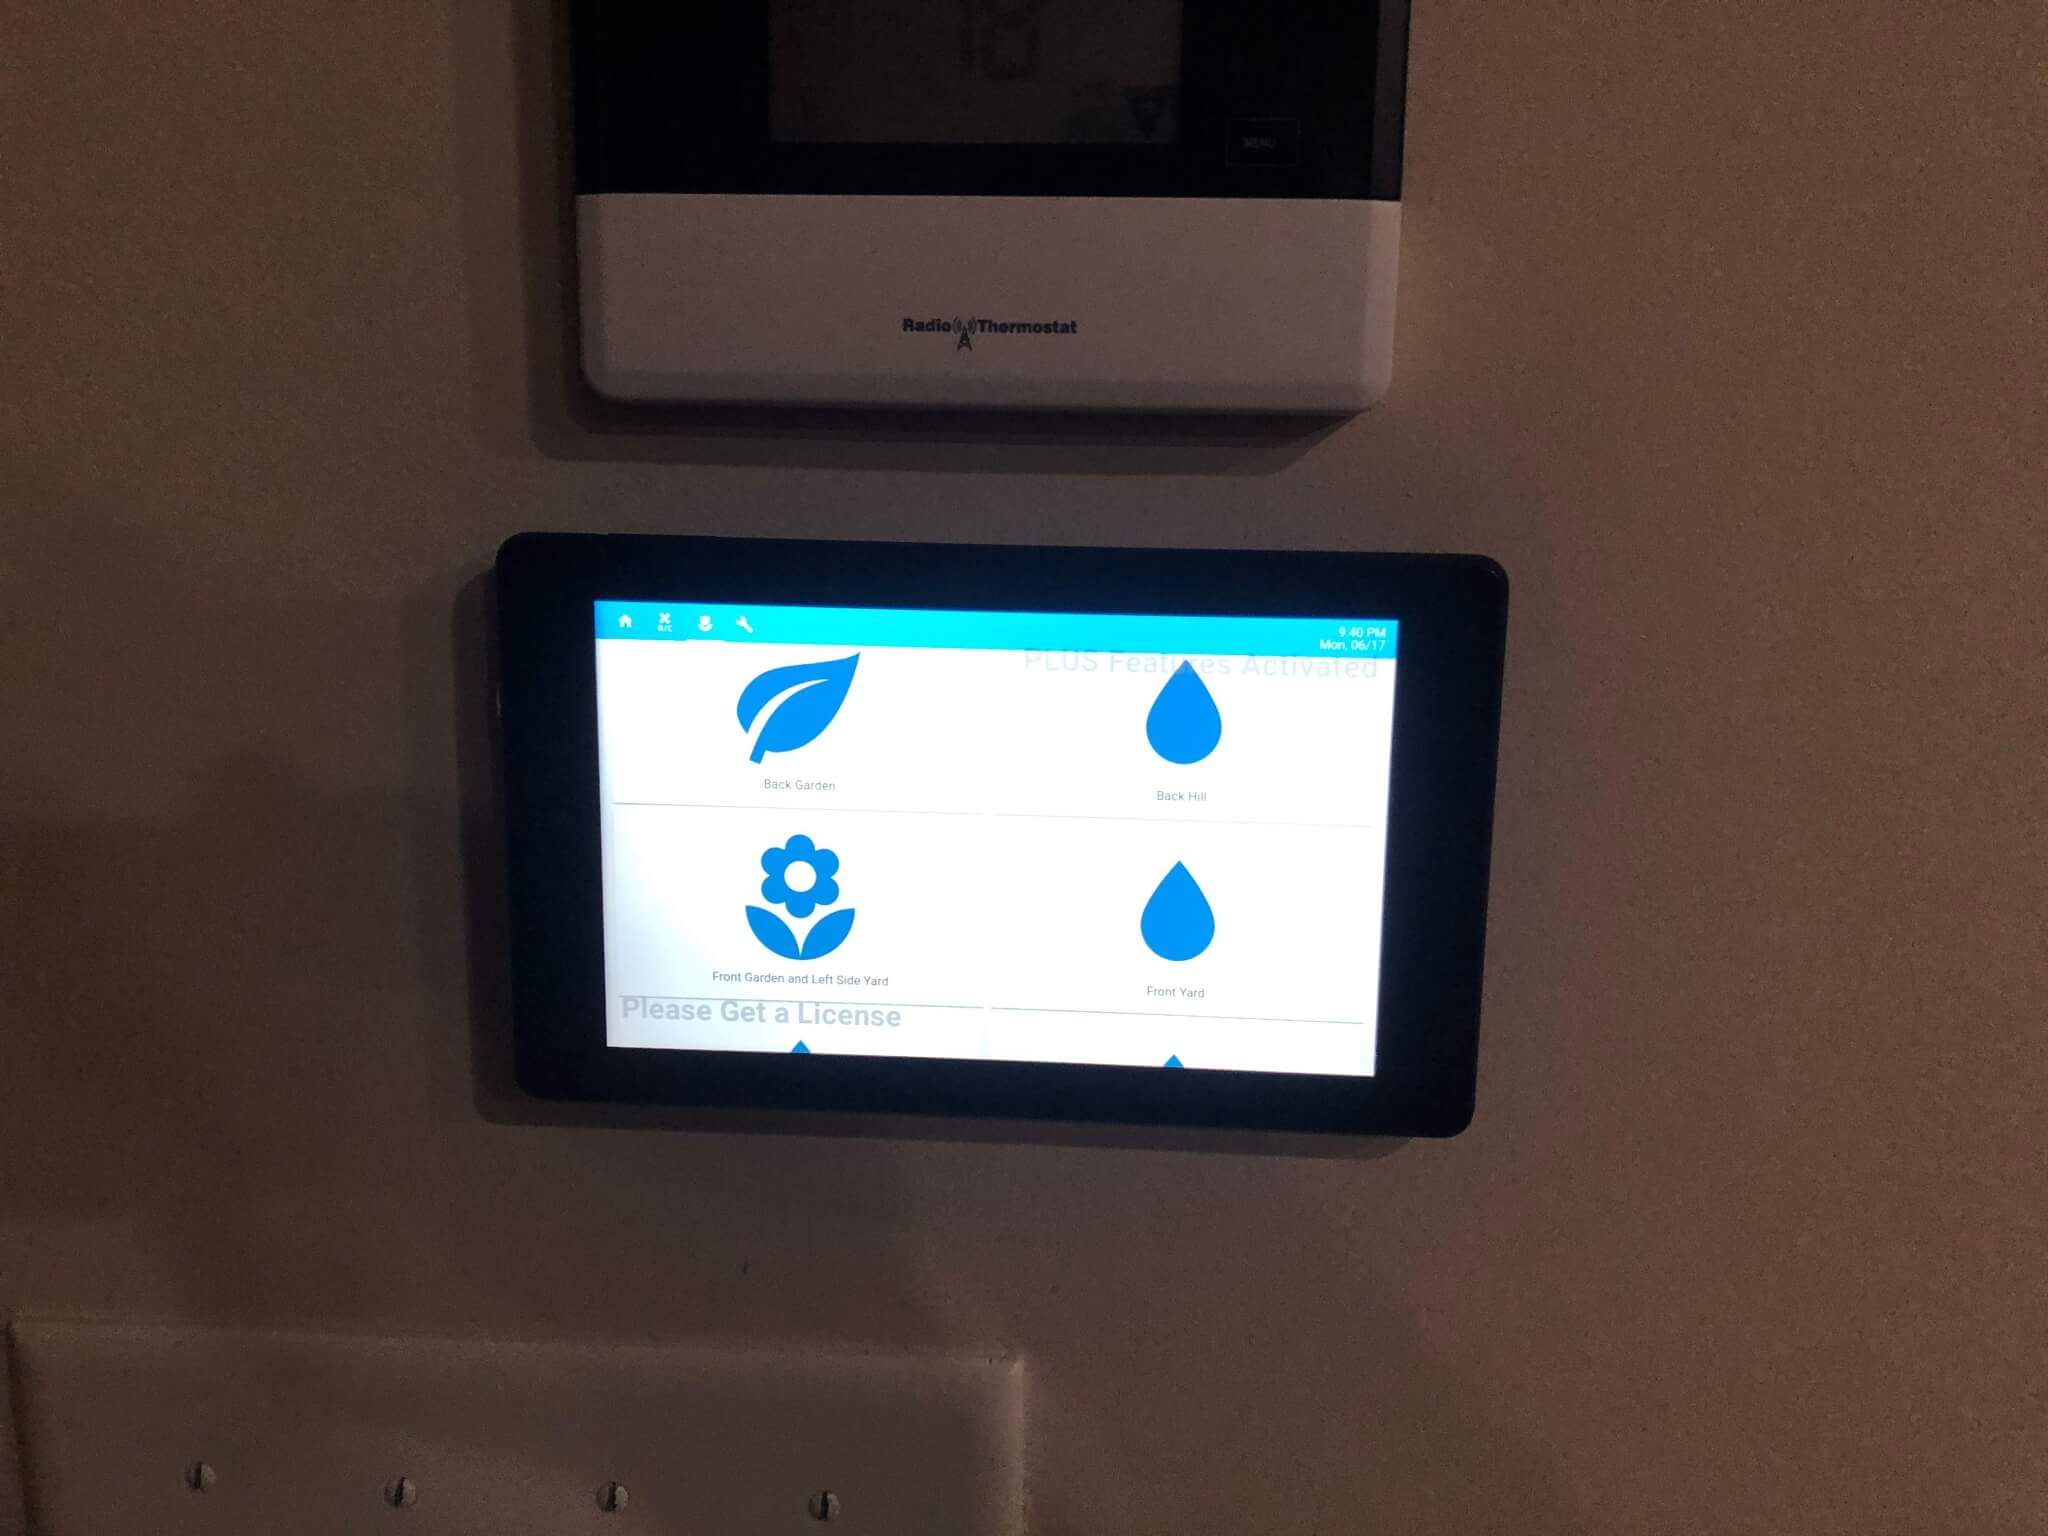
After connecting the power, the power, I just used some 3m Command to stick it over the low voltage bracket. This is what the final product looks like:
Alternative Power Options
I know that most people might not have an outlet that can be hidden away on the other side of the wall. So here are a few ideas that I thought of before I settled on my final solution. Hopefully this can help someone out:
- A PoE to USB device. With this, you would only need to get a network cable behind the wall and run it to a location that has PoE switch. That might be easier than having to deal with a power outlet.
- A recessed single gang box with a USB Outlet. From one of the Amazon questions, they said it is recessed by 1.25 inches. I’m not sure if that’s enough for a regular USB cable, but you may need a right angle USB cable.
- A Qi charger. You would still need the Qi receiver plugged into the tablet. And you would still have the problem of getting power to that charger. This is actually what I was going to do initially, but then my Qi charger wouldn’t fit in the low voltage bracket, so I just cannibalized the Qi receiver.
- I also considered using magnets instead of the 3m Command Strips.
I haven’t tested any of these products myself, but either of these solutions should work.
Setting up Apps on the Kindle Fire
This part might be different depending on what you are trying to accomplish. So I’m just going to outline what I did. Here are the things I set out to accomplish:
- Display the Home Assistant web UI.
- Have the Kindle turn on automatically with motion.
Fully Kiosk Browser
Lucky for me, Fully Kiosk Browser did all this for me. NOTE: If you are using a Fire Tablet, make sure you get the Fire OS version of the apk and install it manually. You can download it from here. The Play Store version will run very poorly. If you are using a regular Android tablet, then you can get it from the Play Store. I’ll talk about configuring Fully Kiosk later.
Installing the Google Play Store
This is optional. But I wanted to install some apps.
- Install Google Play Store
- Go to Settings -> Security -> Enable ‘Apps from Unknown Sources’
- Open the Internet App, and download and install the following 4 APK’s to install the play store:
- Shutdown and restart the Kindle.
- Go to the Home screen, and launch the Play Store app and sign in with your google account. Now you can download apps from the Play Store.
Ariela
I wanted to be able to have the Kindle only charging when it needed it. A few years ago, I had a phone that I was using as a clock that was plugged in all the time. The battery on it puffed up really big. I have no idea if that was because it was plugged in all the time, but I would rather not risk it. So I used Ariela from the Play Store to report the battery life on the Kindle. And I had the Kindle plugged into a smart plug controlled by Home Assistant.
First, I setup the MQTT connection to Home Assistant ( The link shows you how to do that. Assuming you already have the MQTT broker setup in Home Assistant). Make sure you add the config to Home Assistant for the auto discovery so the battery sensor gets added. Then in the Sensors settings, make sure it is set to report the battery. You will then want to enable ‘Permanent Notification’ to ensure it is always reporting the battery life.
I’m only using it for the battery right now, but there are some cool things you can do with MQTT via Ariela.
And here’s the YAML code for HA to turn on/off the charging as necessary. Any smart plug that works with HA will do:
- id: '1560102083597'
  alias: Kindle Charge
  trigger:
  - minutes: '/1'
    platform: time_pattern
  condition:
  - below: '35'
    condition: numeric_state
    entity_id: sensor.fire_battery_sensor
  action:
  - data:
      entity_id: switch.0xd0cf5efffedcd76c_switch
    service: switch.turn_on
  initial_state: true
- id: '1560127415645'
  alias: Kindle Discharge
  trigger:
  - minutes: '/1'
    platform: time_pattern
  condition:
  - above: '85'
    condition: numeric_state
    entity_id: sensor.fire_battery_sensor
  action:
  - data:
      entity_id: switch.0xd0cf5efffedcd76c_switch
    service: switch.turn_off
  initial_state: true
Here’s a graph for the last 72 hours. The large dip is when I had it unplugged because I was messing with it. And the longer discharge at the end is when I figured out how to enable the screen off timer without running into issues by disabling the lock screen, which I talk about below. It used to charge it around 4 times per day, and now it’s around 2 times per day.

Configuring Fully Kiosk Browser
I’m not going to go deep into the configuration. I’m mainly just going to post screenshots of my config sections that matter and explain a few settings. On the Fully Kiosk web page, they have detailed descriptions of the settings when you scroll down a little bit.
- I disabled the pull down to reload because I kept reloading by accident.
- I enable auto reload on idle after 10 minutes in case there was some issue with HA.
- I also specified a Custom User Agent String. I did this so that I can disable menus and stuff using Compact Custom Header LoveLace card. It let’s you basically have a different interface based on things like user agent strings, user names, etc.
- I enable the screensaver to go to 0% brightness after 20 seconds. And the screen to turn off after 20 minutes of idle. I did it that way because sometimes it was slow to wake the screen.
- I set the screen to always stay on. When the screen goes off, it puts the Kindle back to the lock screen so you have to swipe to unlock it. But then I read about a way to get rid of the lock screen. I talk about that further down. After that, I set it to turn the screen off after 20 minutes of no motion/idle.
- I set it to launch on boot.
- Set the brightness. Sometimes I noticed that if I left the app, the brightness would go back down to dim. This fixed that issue.
- I haven’t messed with Kiosk Mode just yet, but I think I might enable it in the future.
- I enabled the Remote Admin. That let’s me configure things from a web browser on my computer. That’s how I got the screenshots below.
Disabling the Lock Screen
As I mentioned above, I disabled the lock screen which would come up if the screen turned off. Before that, I just set the screen to always stay on. With the screen on all the time, the battery would take 7 hours to go from 85% to 35%. Now it takes 12 hours. So it’s using around 40% less juice to run this. Either way, it will use somewhere around $2 to $4 in electricity per year.
NOTE: There are some side effects of doing this:
- The Play Store will not work. Nothing will download.
- Notifications will not work.
- The Settings Shortcuts will not work.
- There might be other weird issues like that that I have missed. However, it doesn’t appear to hinder any of the functionality I have mentioned in this article, which is what I’m guessing most of the people reading this are looking for.
You can just set the ‘device_provisioned’ setting mentioned back to 1, and things will work without a reboot. So you can do what you need to do, like download or update an app. Then you can set it back to 0, which will require a reboot.
- Install Settings Database Editor
- Enable ADB. This link has more details on the process.
- Go to Settings -> Device Options and tap on the serial 7 times to enable Developer Options.
- Press back and come back to Device Options and at the bottom you should see Developer Options
- Turn ADB on.
- On Windows, install the ADB drivers for the Fire. If you have ever connected the Fire to that computer, you will need to point the device in device manager to these new drivers. If you haven’t it will use these newly installed drivers automatically.
- Download and install the Android Studio SDK, which contains ADB.
- Open a command prompt and use the ‘cd’ command navigate to where you installed the SDK, specifically where the adb.exe executable is located.
- Connect the Fire tablet and run the command
adb devicesThis should display the Kindle in the list. That means this part of the setup is good to go.
- Run this command:
adb shell pm grant by4a.setedit22 android.permission.WRITE_SECURE_SETTINGS - Open Settings Database Editor on the Fire and change the top right dropdown to ‘Global Table’.
- Scroll down and tap on ‘device_provisioned’ and tap ‘Edit Value’. Change it to 0.
- Restart the Fire and you should no longer have a lock screen.
LlamaLabs Automate
One issue that I ran into was that I installed WhatsApp on the tablet, linked to my home phone number. This way we can make video calls to/from the tablet. However, when the tablet was called the screensaver was usually on, so screen brightness was 0. But, WhatsApp would take over the camera, so Fully Kiosk could no longer do its motion detection, so the screen would be super dark and unusable.
So I installed Automate and created a flow that checks to see if WhatsApp is in the foreground, and if it is, it turns the brightness up.
Compact Custom Header for Home Assistant
With the limited screen real estate on the Fire Tablet, I was looking for a way to make the header bar smaller in Home Assistant. Compact Custom Header was perfect for this, plus some more stuff. CCH is a hidden LoveLace card that can make the header smaller, hide things like the menu or mic icon, and do these things differently based on the user or the browser or device that is accessing HA. I used the ‘Home Assistant Community Store‘ to install it. HACS is a custom component that really needs to become an official part of HA. It allows you install a ton of different custom components and cards easily. Whether you use HACS to install CCH or install it manually, the instructions for installing either one are on their sites.
After installing it, click the 3 dots at the top right in LoveLace and then click ‘Configure UI’. Then click the 3 dots and click “Raw Editor”. Add a section under the cards on the first view with the following code ( You will need to change this code according to your own preferences):
- exceptions:
    - conditions:
        user_agent: FullyKiosk
      config:
        clock_date: true
        menu: hide
        notifications: hide
        options: clock
        sidebar_closed: true
        sidebar_swipe: false
  main_config: true
  notifications: overflow
  type: 'custom:compact-custom-header'
You will also need to add type: 'custom:compact-custom-header' under the cards for each view. If you don’t, the view will not render correctly. But all the main configuration happens in that first view.
In my code, I have set the notifications icon to go into the 3 dots menu on all views for all users. In the exceptions, I am saying that any device with a user agent string of ‘FullyKiosk’ will have some special settings ( Be sure to set the User Agent String in the Fully Kiosk app settings). For Fully Kiosk, I am essentially disabling the sidebar, notifications, and the menu, and showing a clock.
Conclusion
And that’s it. I covered a lot, but this was actually one of my quickest projects. I probably spent about an hour on the mounting/electrical, and maybe 2 hours setting up everything on the Kindle. A lot of that 2 hours was spent researching to get past all the tiny issues I had and documented in this article. But I as able to get past each and every one, and it’s been incredibly solid. It’s turned on every time I walk up to it ( Or past it). Outlet to charge it turns on and off at exactly the right times. Overall, I’ve been happy with it. It makes controlling the thigns in a house a lot easier for everyone else. I might eventually upgrade to a tablet with a smaller bezel, but this small Fire tablet still looks pretty good on that wall.
I followed your guide and everything works perfectly. The only thing: I can’t get this graph https://bit.ly/32ERmvP
so it comes to me <a href=”https://imgbb.com/”><img src=”https://i.ibb.co/RbNf5nr/Cattura.png” alt=”Cattura” border=”0″></a>
I followed your guide and everything works perfectly. The only thing: I can’t get this graph https://bit.ly/32ERmvP
I get this https://ibb.co/zxFpkc9
Another way around the lock screen is to use the Fully Kiosk browser app and set the screensaver to use a black screen and use motion detect to turn the screensaver off.
Basically that just dims the screen and voila, any tapping of the screen or motion detect just turns off the screensaver. It never goes into lock screen.
This seems very useful