In my last post about flashing a cheap LED controller, I mentioned that method is only really worth it if you already had the strip or the controller already laying around. However, if you wanted an LED strip project from scratch, I would highly recommend that you just create an addressable LED strip. It will cost almost the same, it is actually easier to do, and it will give you a lot more control over the strip. And I don’t know if it is the strips that I got, but the color from the addressable strip seems be a lot nicer than the dumb strips from my last post. That could just be because the LEDs are closer together.
Anyways, here’s what you will need for this:
- Wemos D1 Mini – Amazon | AliExpress
- ws2812b LED Light Strips – Amazon | AliExpress
- 5v Power Supply | AliExpress – NOTE: You will need about 50mA of power for every LED, at full brightness. That’s about 1.5A per 30 LEDs. I bought the 300 LED set with the 10A power supply, but I cut the strip at about 120 LEDs. So that way, I only need about 6 amps, and I have some overhead. If you want to use the full 300 LEDs on the roll, then you will likely want to go with the 15A power supply. Also, you will want to solder the power supply to multiple points along the wire. If you want to be safe, just stick to shorter strips.
- A resistor – It needs to be between 220 and 470 Ohms.
- Soldering iron
- MicroUSB Cable – You only need this to program the Wemos. After that is done, you don’t really need it again.
Soldering and Wiring
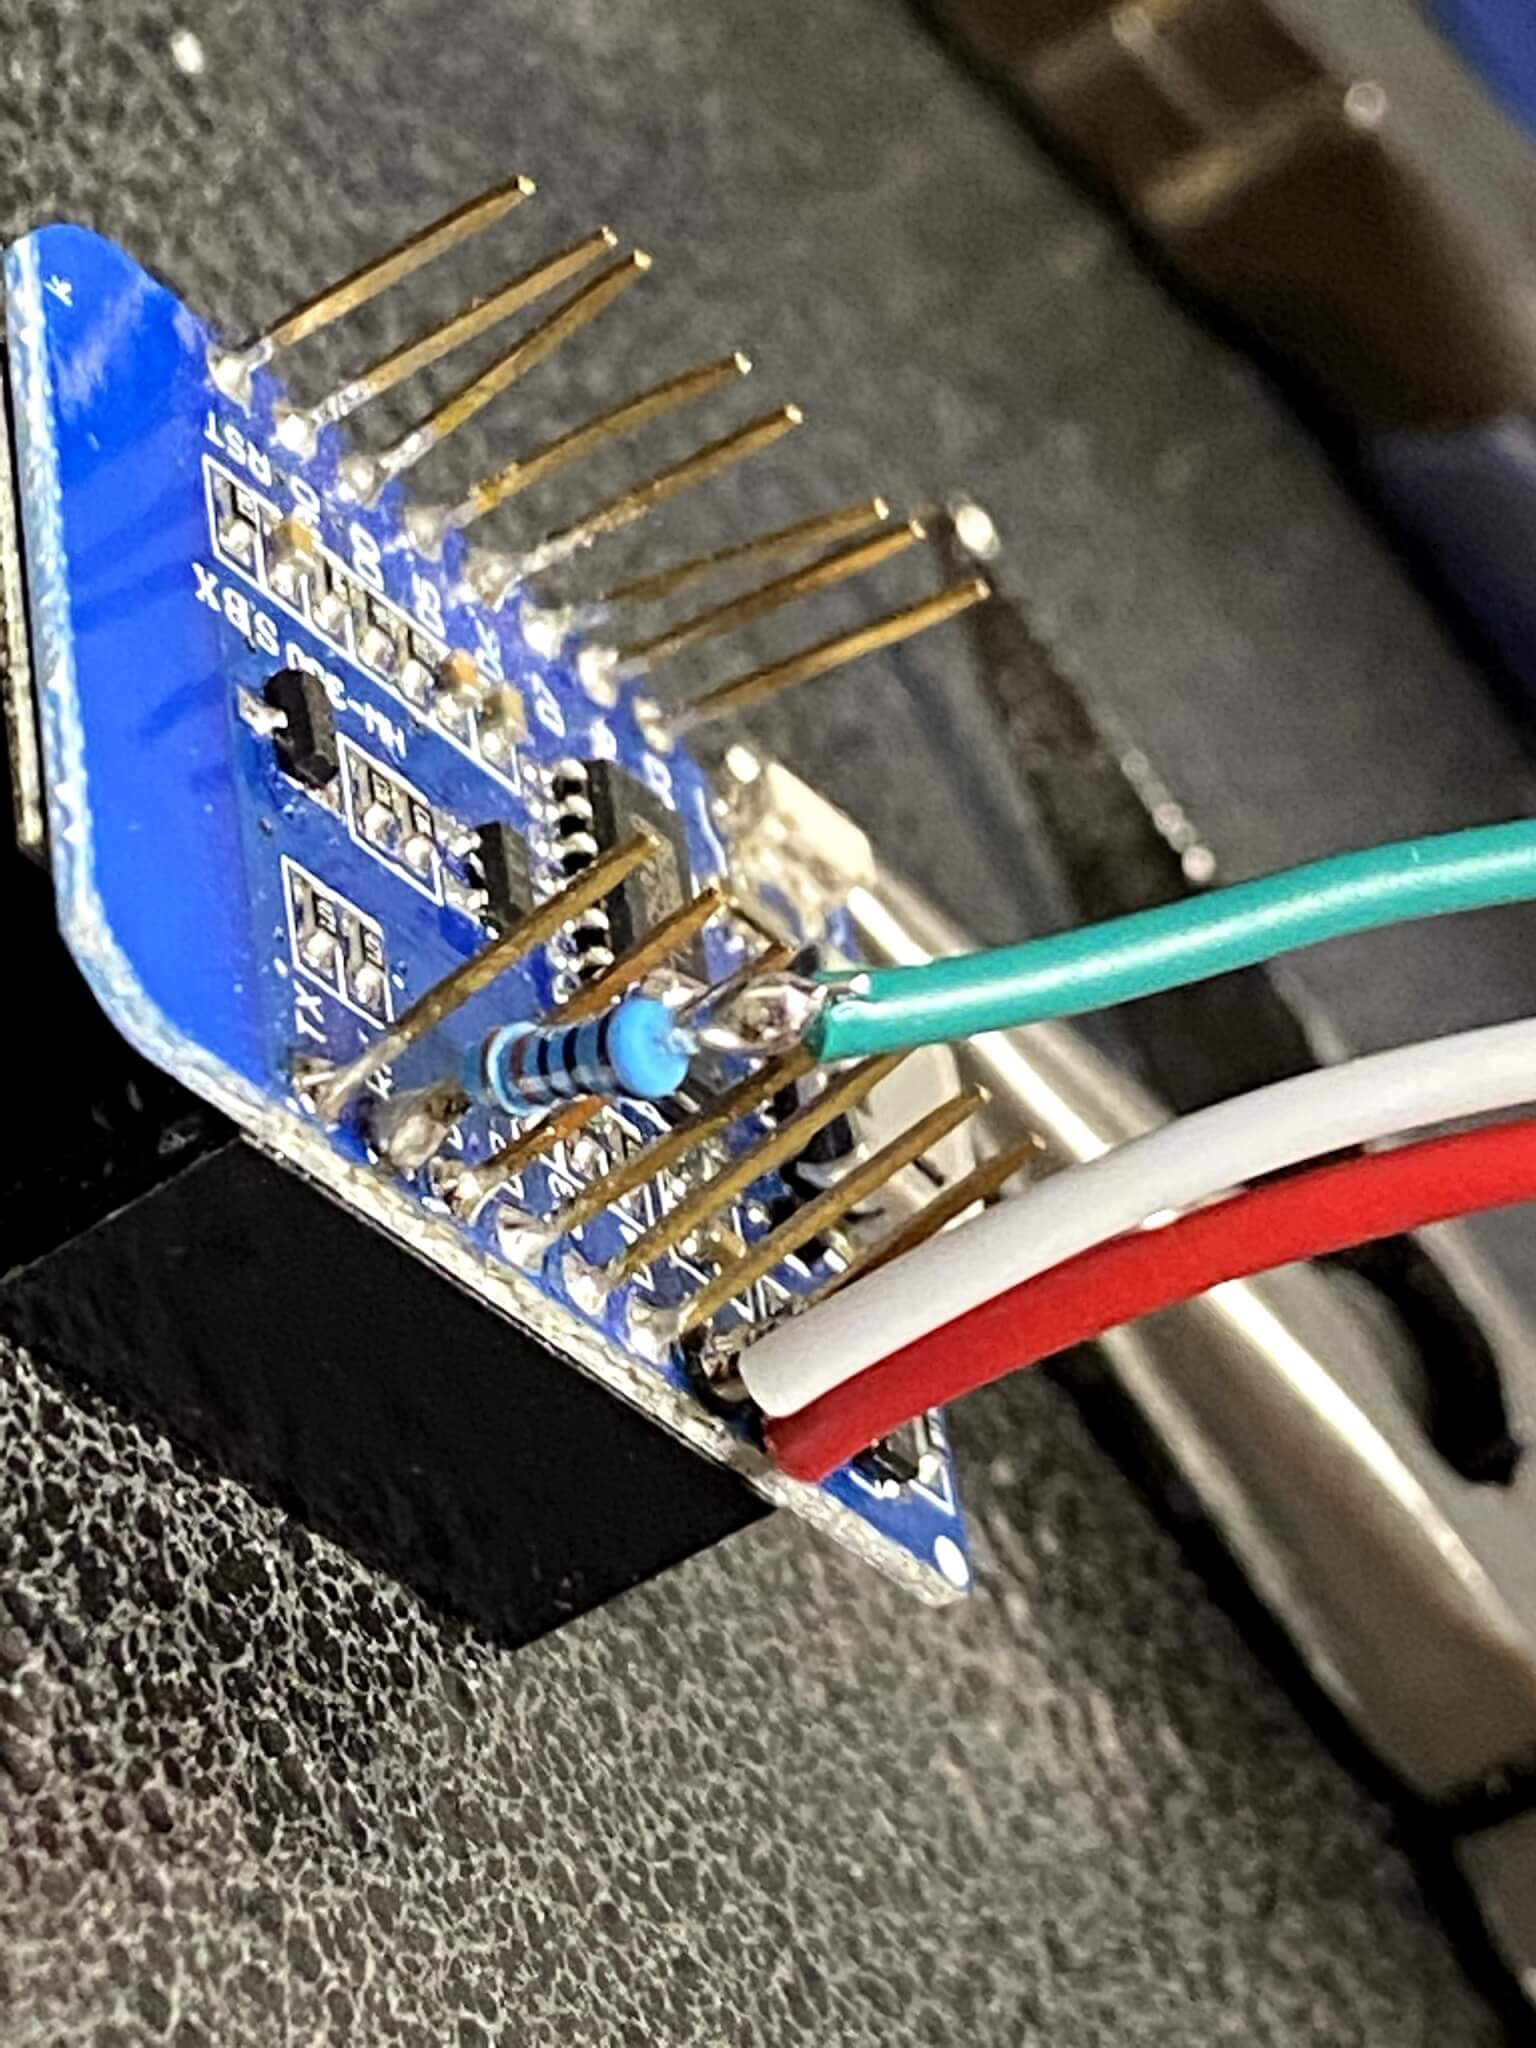
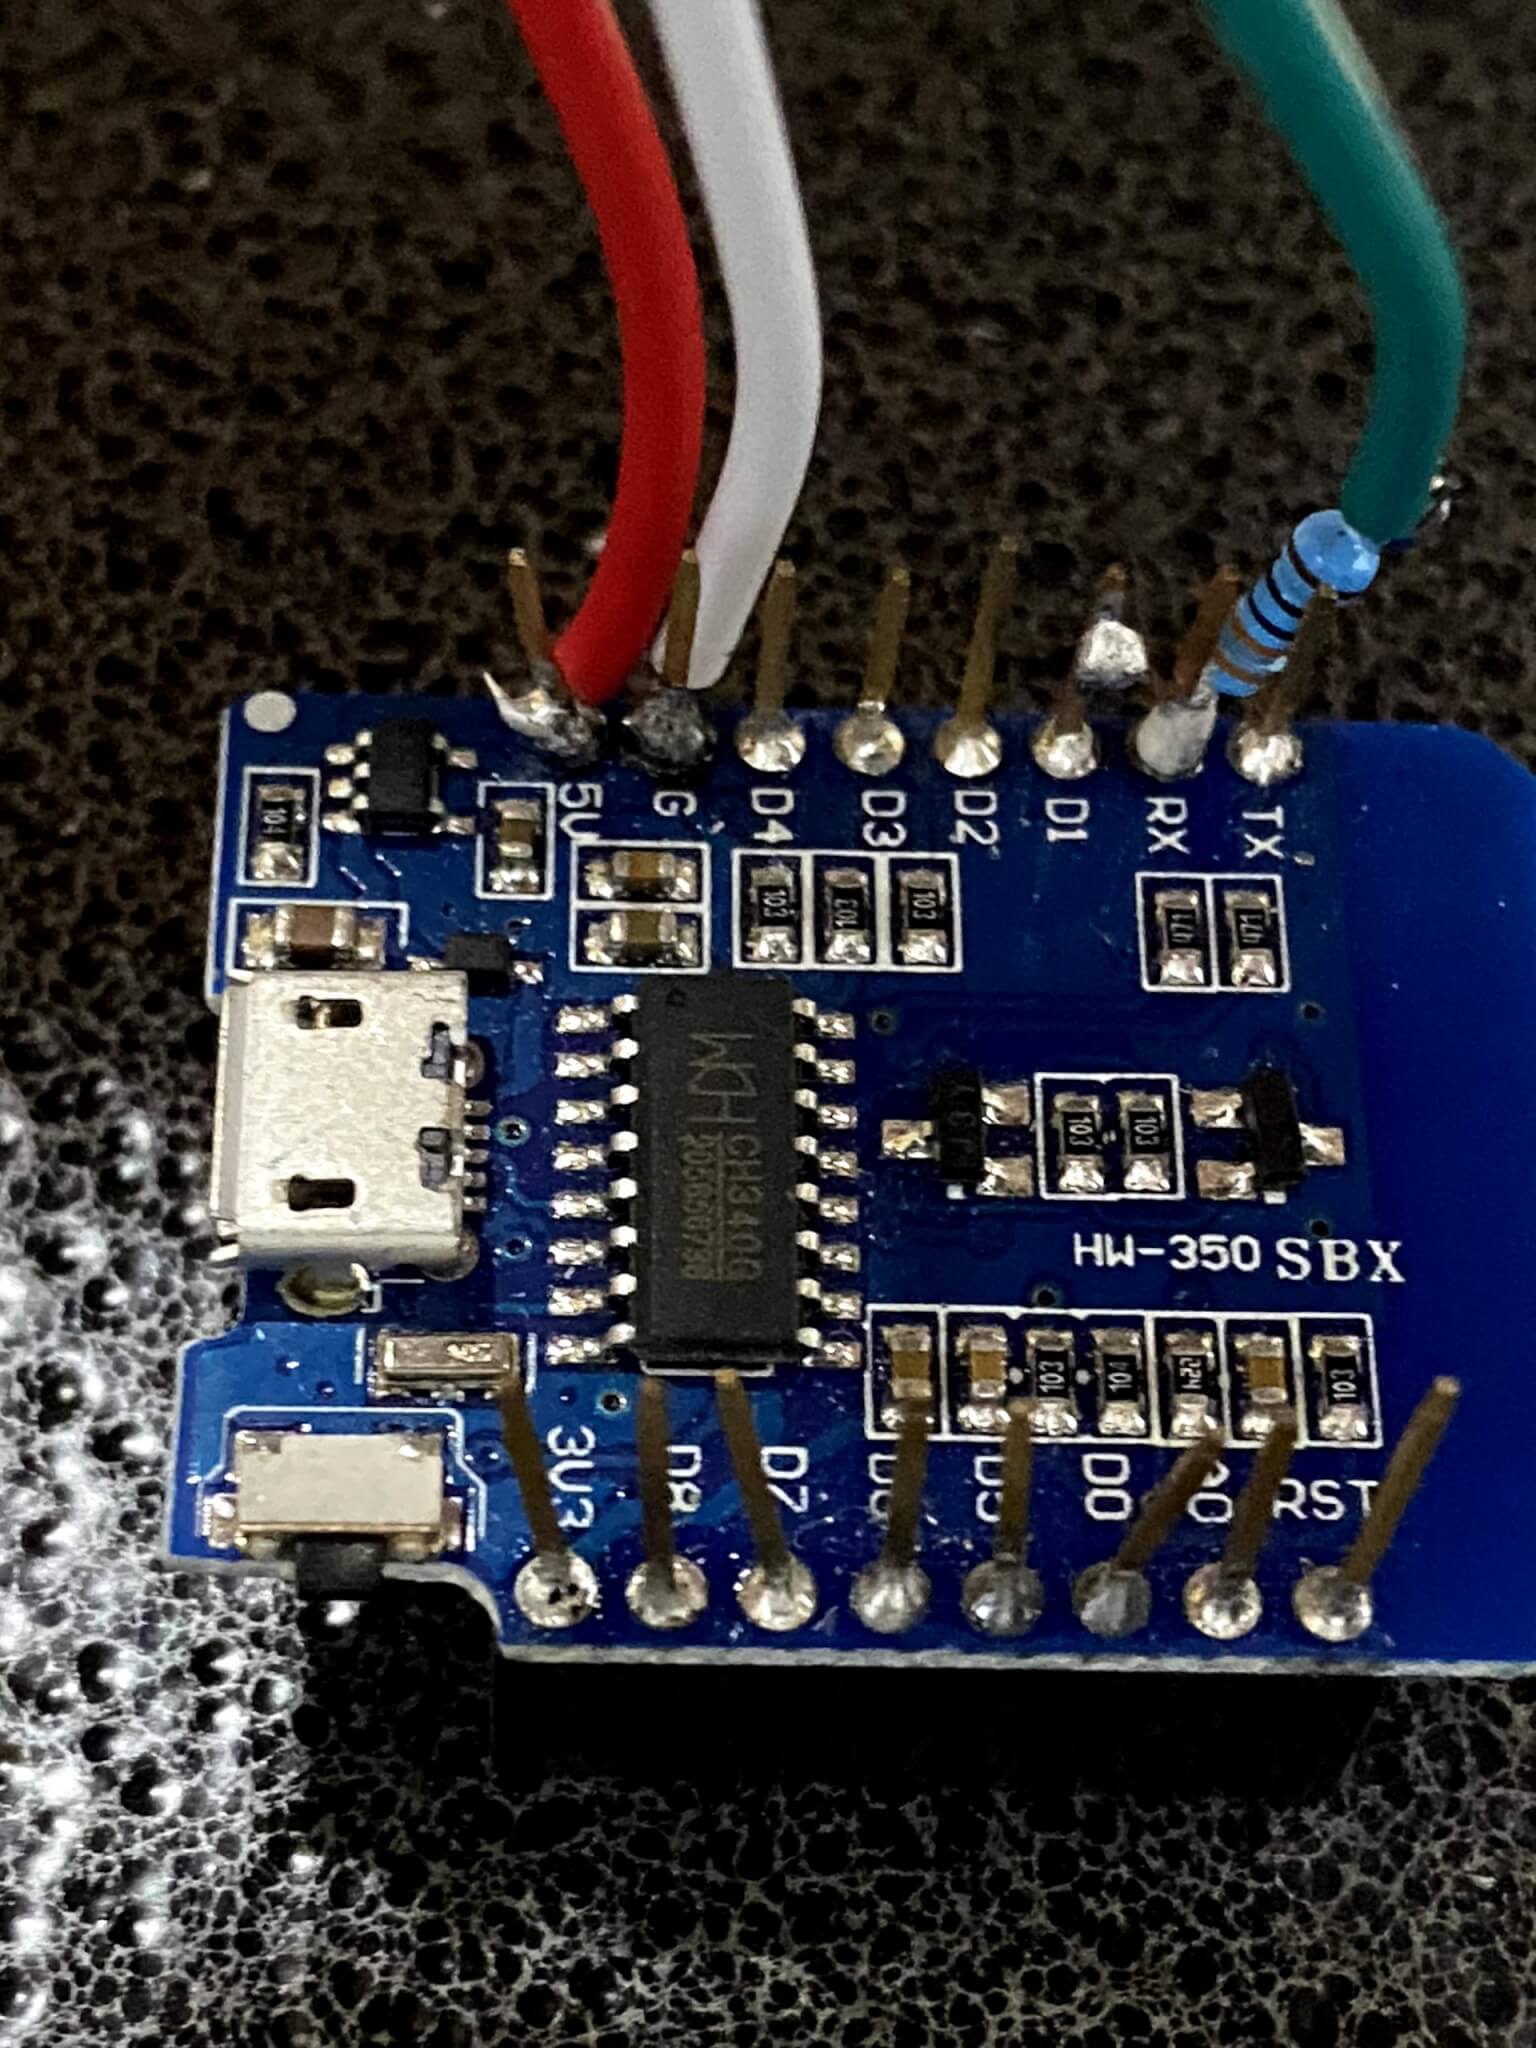
Connecting everything up is pretty easy. The light strip comes with the wires that you need, and the power supply comes with a connector to easily connect the power wires. The LED should come with separate connector with 3 wires. That connector needs to be soldered onto the Wemos. Red wire goes to the 5v pin and white goes to ground. On the RX pin (Use pin D4 if you want just want to use WLED instead of ESPHome) on the Wemos, solder on the resistor. Then on the other end of the resistor, you solder on the green wire. Here are a few pictures of that:

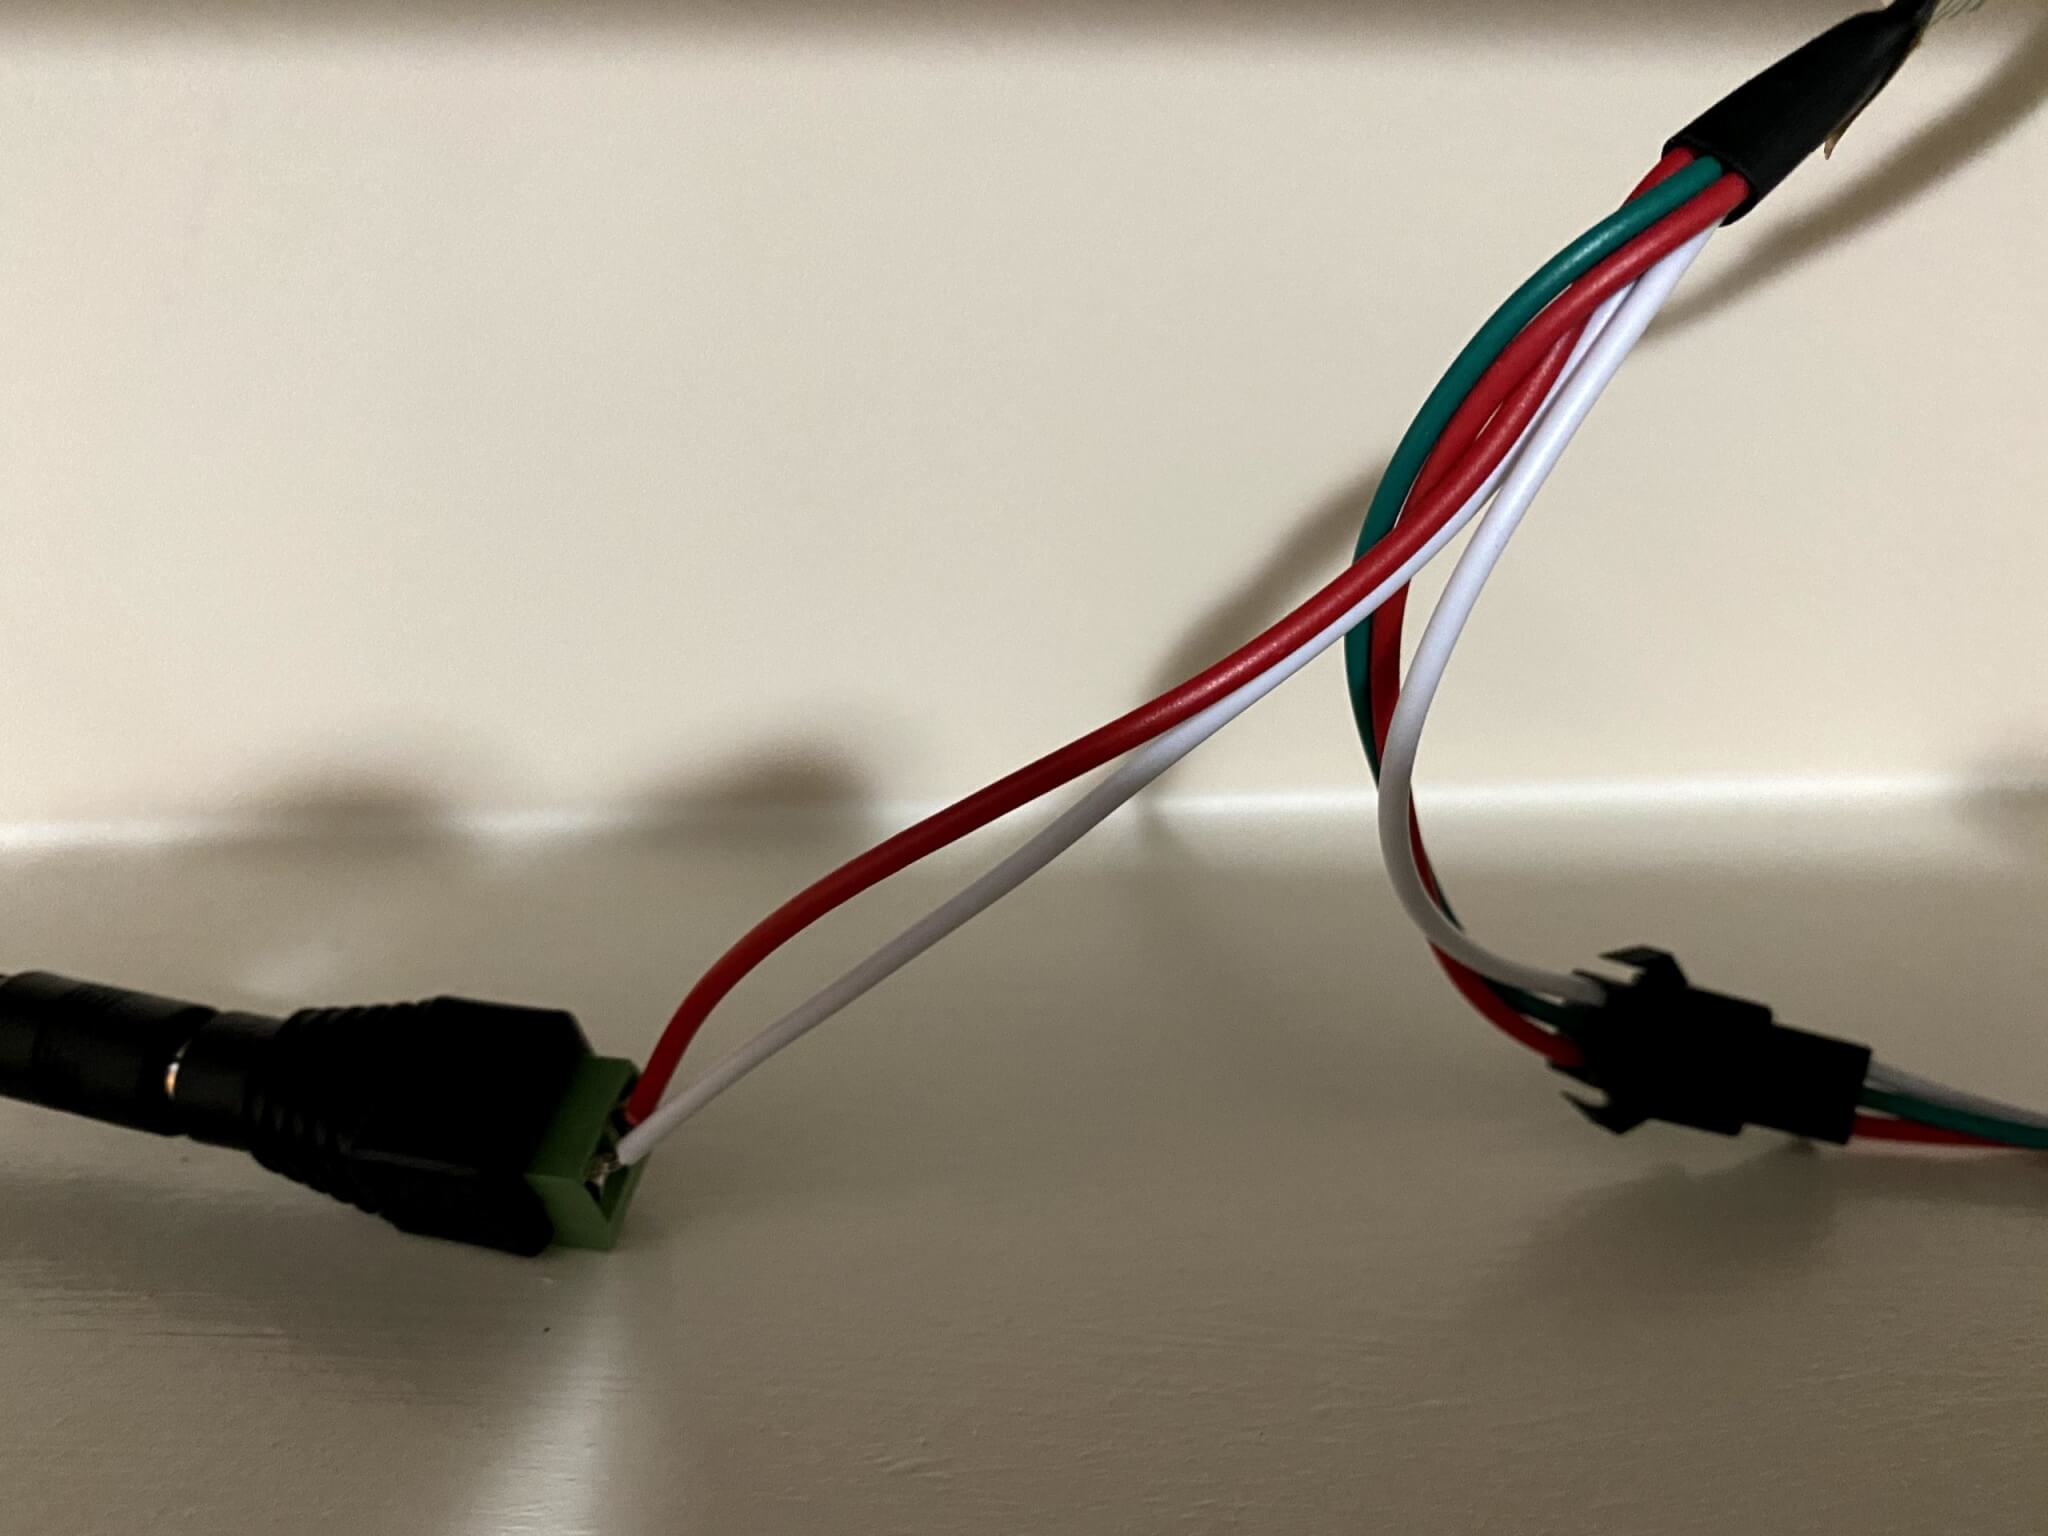
On the LED Strip, there should be a similar JST connector that would connect to the one you put on the Wemos. In addition, there will be another pair of loose wires. One red and one white. Those will go onto the small connector that came with the power supply. The red wire goes into the side with the ‘ + ‘and the white into the ‘ – ‘ side. Then tighten the screw down. You shouldn’t be able to pull that wire out. Here’s a picture of it:

NOTE: DO NOT PLUG EVERYTHING IN YET. The main reason is that you don’t want to connect the Wemos to the power supply, and then plug it into your computer. You risk frying your computer by doing that.
Flash the Wemos D1 Mini with ESPHome
I flashed it using ESPHome. Please refer to my ESPHome article on setting that up. Now, just plug in the camera into your Home Assistant computer and go to the ESPHome web interface. Click the + button and fill out the form to create the device. Now edit the template, and put in the following code. Be sure to put in your own SSID and WiFi password. :
esphome:
  name: master_tv_led
  platform: ESP8266
  board: d1_mini

wifi:
  ssid: "YourSSID"
  password: "WiFiPass"


  # Enable fallback hotspot (captive portal) in case wifi connection fails
  ap:
    ssid: "Master Tv Led Fallback Hotspot"
    password: "rwer4wfrtw453wt4"

captive_portal:

# Enable logging
logger:

# Enable Home Assistant API
api:
  password: "pass"

ota:
  password: "pass"

web_server:
  port: 80

light:
  - platform: neopixelbus
    type: grb
    pin: GPIO3
    num_leds: 121
    name: "TV Light"
    variant: ws2812x
    default_transition_length: 3s
    effects:
      - addressable_random_twinkle:
          progress_interval: 250ms
      - addressable_fireworks:
      - addressable_flicker:
      - addressable_rainbow:
      - addressable_color_wipe:
      - addressable_scan:
          name: Scan Effect With Custom Values
          move_interval: 100ms
          scan_width: 6
In Home Assistant, go to Configuration -> Integrations, and the new LED strip should be at the top. Just click on that to set it up, and you should be all set. You can now control the lights using Home Assistant.
Using WLED
WLED is a good alternative to ESPHome, and is actually what I have switched over to. It has a ton more option for LED strips. The easiest way to use it is to flash the binary available from the latest release. Then follow the steps on this page to flash the Wemos with that binary.
In my case, I didn’t feel like changing the data pin from the RX pin to D4, so I recompiled the source code using Arduino IDE. In the NpbWrapper.h file, I changed “#define LEDPIN 2” to “#define LEDPIN 3”. Then I exported the compiled binary from the Sketch menu. It is saved in the same folder as the source code.
After flashing WLED, it will present itself as a WiFi access point. Just connect to it on your phone(The password is ‘wled1234’). It should present you with the WiFi configuration page, where you can enter the information for your network.
After that, find the IP address of the Wemos, and connect to that IP address in your web browser, and you can control the LEDs straight from there. You can also add it into Home Assistant on the Integrations page. It should discover it automatically.
And that’s it. Please feel free to comment or ask any questions. For my next project, I plan to write about having those lights turn off automatically when you start playing a movie through Plex or another Home Assistant integrated media player.
Hi, I plan on following this tutorial as it looks great. Just wanted to let you know the AliExpress links do not work (for me anyway).
Thanks for the heads up on the links.
Do you have a link for the 5v jack socket? All I can find on Ali do not have their amp rating. Thanks.