Creating a Speed Cube Timer Using an ESP32 with OLED
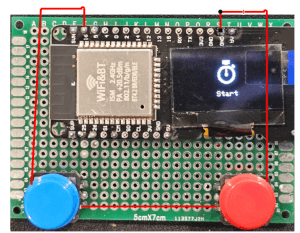
My son wanted a Rubiks Cube timer, and I told him we could make a really basic one in an hour. So I pulled out the ESP32 with the built in OLED and got a couple buttons to make one.
Home Automation with Home Assistant and ESP8266, 3D Printing, and other Technology

My son wanted a Rubiks Cube timer, and I told him we could make a really basic one in an hour. So I pulled out the ESP32 with the built in OLED and got a couple buttons to make one.

As I talked about in my last post about the FilaWeigher, I wanted to add MQTT and temperature/humidity(Using the BME280) to that project. Well, I've done that. Refer to the previous post for more details. But now for this one, I'm just going to focus on the updated code and schematics, and the Home Assistant integration via MQTT. I'm going to leave the old post up for the people that don't want MQTT or the BME280 sensor. This version also has JSON output of all the sensors which allows for OctoPrint integration(I actually just finished up that plugin and I'm going to be posting that up soon).

So as someone that has a blog that mainly has posts that either relate to the ESP8266 or Home Assistant, I feel like I should have been using ESPHome a long time ago