NOTE: I have noticed, along with many other people, a small constant buzzing sound from my chime. This buzzing appears to affect many smart doorbell like Ring, August, and Nest along with this one. I think I might have an easy fix at the end of this post.
Ever since Ring released their video doorbell a few years ago, I’ve been waiting for a WiFi video doorbell that didn’t rely on the cloud (and a monthly fee), was powered by hard wire, and still looked decent. I’ve only had it for a few days, but I think that the Nelly Security doorbell accomplishes this. Unfortunately, it looks like the Nelly version is out of stock at the time of writing, but this doorbell has been rebranded by a bunch of other companies, one of which is Nelly. Uniden also has their own rebranding of it. All of them are pretty much the same except for the logo. Even the firmwares are all interchangeable. Some of the other companies using this camera are HikVision, LTS, and Clare.
Here’s what you will need:
- The Doorbell itself
- Your doorbell transformer must be between 16vac and 24vac. Here’s one in case it is not. There’s a good chance that your existing doorbell transformer will work.
- Your doorbell chime will need to be compatible with the transformer.
- Some basic screwdrivers.
- Smartphone
The first thing you need to find your doorbell transformer and make sure the voltage will work. This was a challenge for me, but in the end it, turned out that the transformer was right behind my doorbell chime near my entrance. From what I have read, it could be in a number of places. Maybe directly under the door in your basement or crawl space, in your electrical panel, in your attic, or somewhere on your furnace. Lucky for me, mine was 16vac, so it should work with the WiFi doorbell.
Next, check and see if you have a mechanical doorbell chime or a digital one. If your chime plays a fancy tune, then it’s likely a digital one. If it just goes ‘ding-dong’, then it’s probably a mechanical doorbell. I had a mechanical doorbell. But if you have a digital one, you will need to connect the supplied diode in-line in the wiring from the video doorbell to the chime.
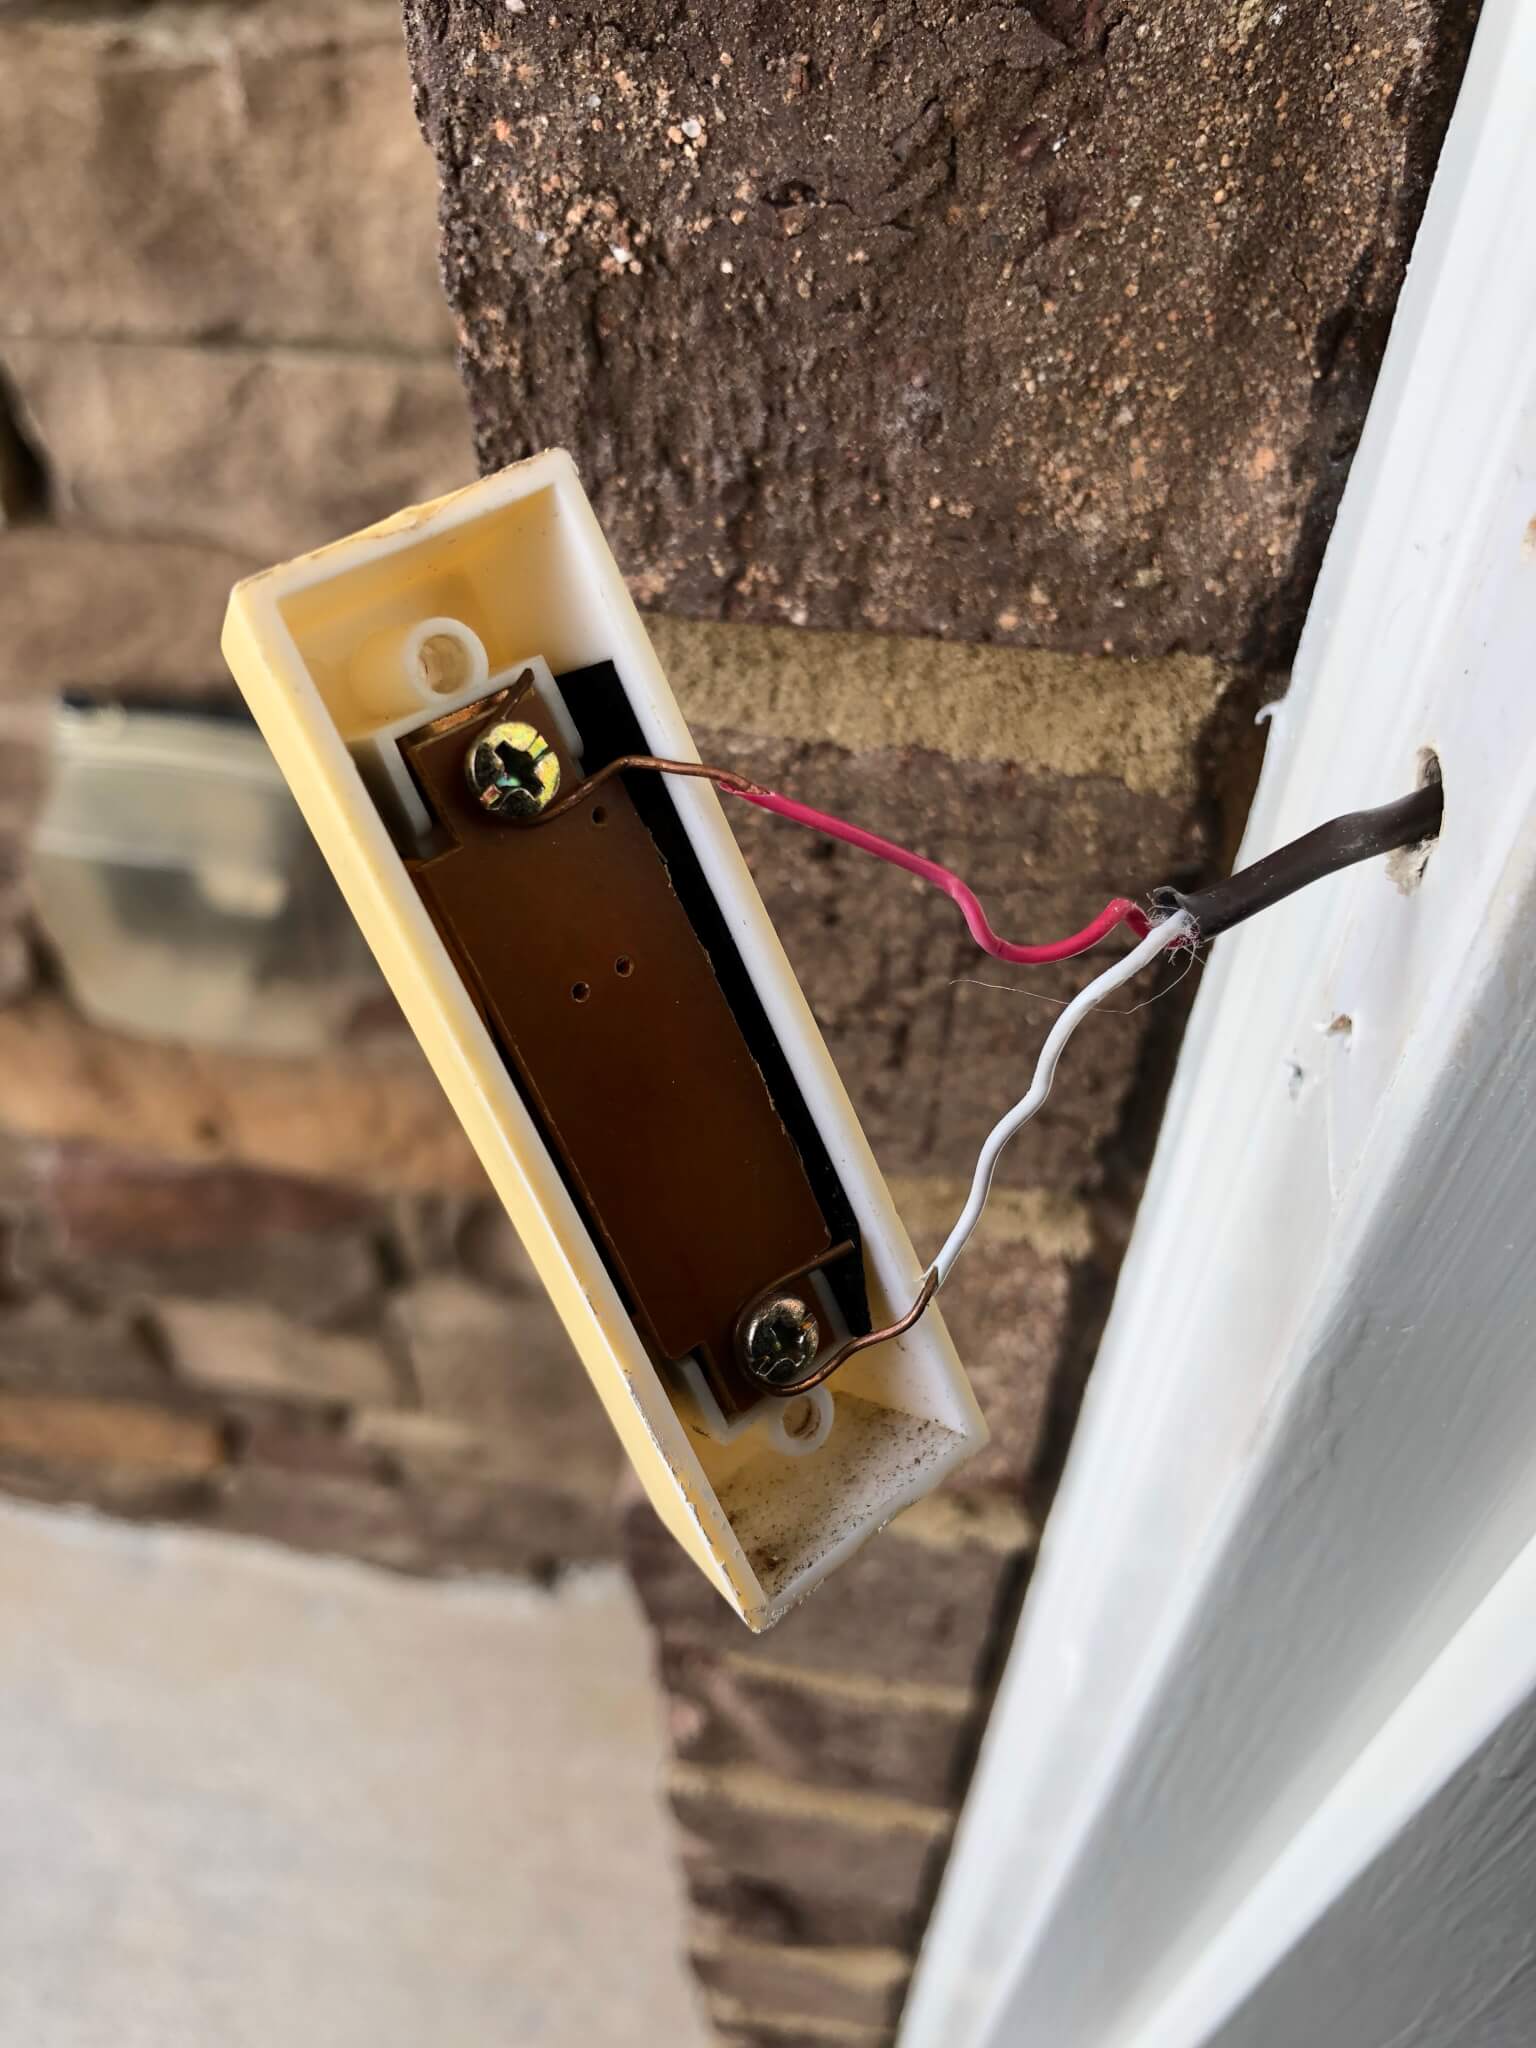
The picture on the left is the chime, and the one on the right is the transformer, which was behind the chime. If your transformer isn’t correct, then you will need to replace it. Just connect the wires the same way as the old one, but make sure you cut the power to the doorbell first.


Both leads from the transformer go the the chime, but one of them go through the doorbell button first.
Once you have confirmed you have a compatible transformer, you can remove the old doorbell button. Most of them should just be 2 screws holding it to the wall/doorframe. After you remove those screws, loosen the 2 screws holding the wires, and disconnect the wires:


Now you just need to connect the video doorbell. Everything I’ve see says the way the wires are connected don’t matter, but when I connected mine, it wouldn’t connect to WiFi until I reversed the wires, and it worked. Just something to consider in case you have issues connecting to WiFi.

After you have it connected, the light around the button should turn on. Wait a minute, and it should start blinking blue and red. It is waiting to be configured now. Open up the app on your phone. Tap ‘More -> Settings -> WiFi Settings’. Put in the information for your network and tap ‘Generate’. That will generate a unique QR code.
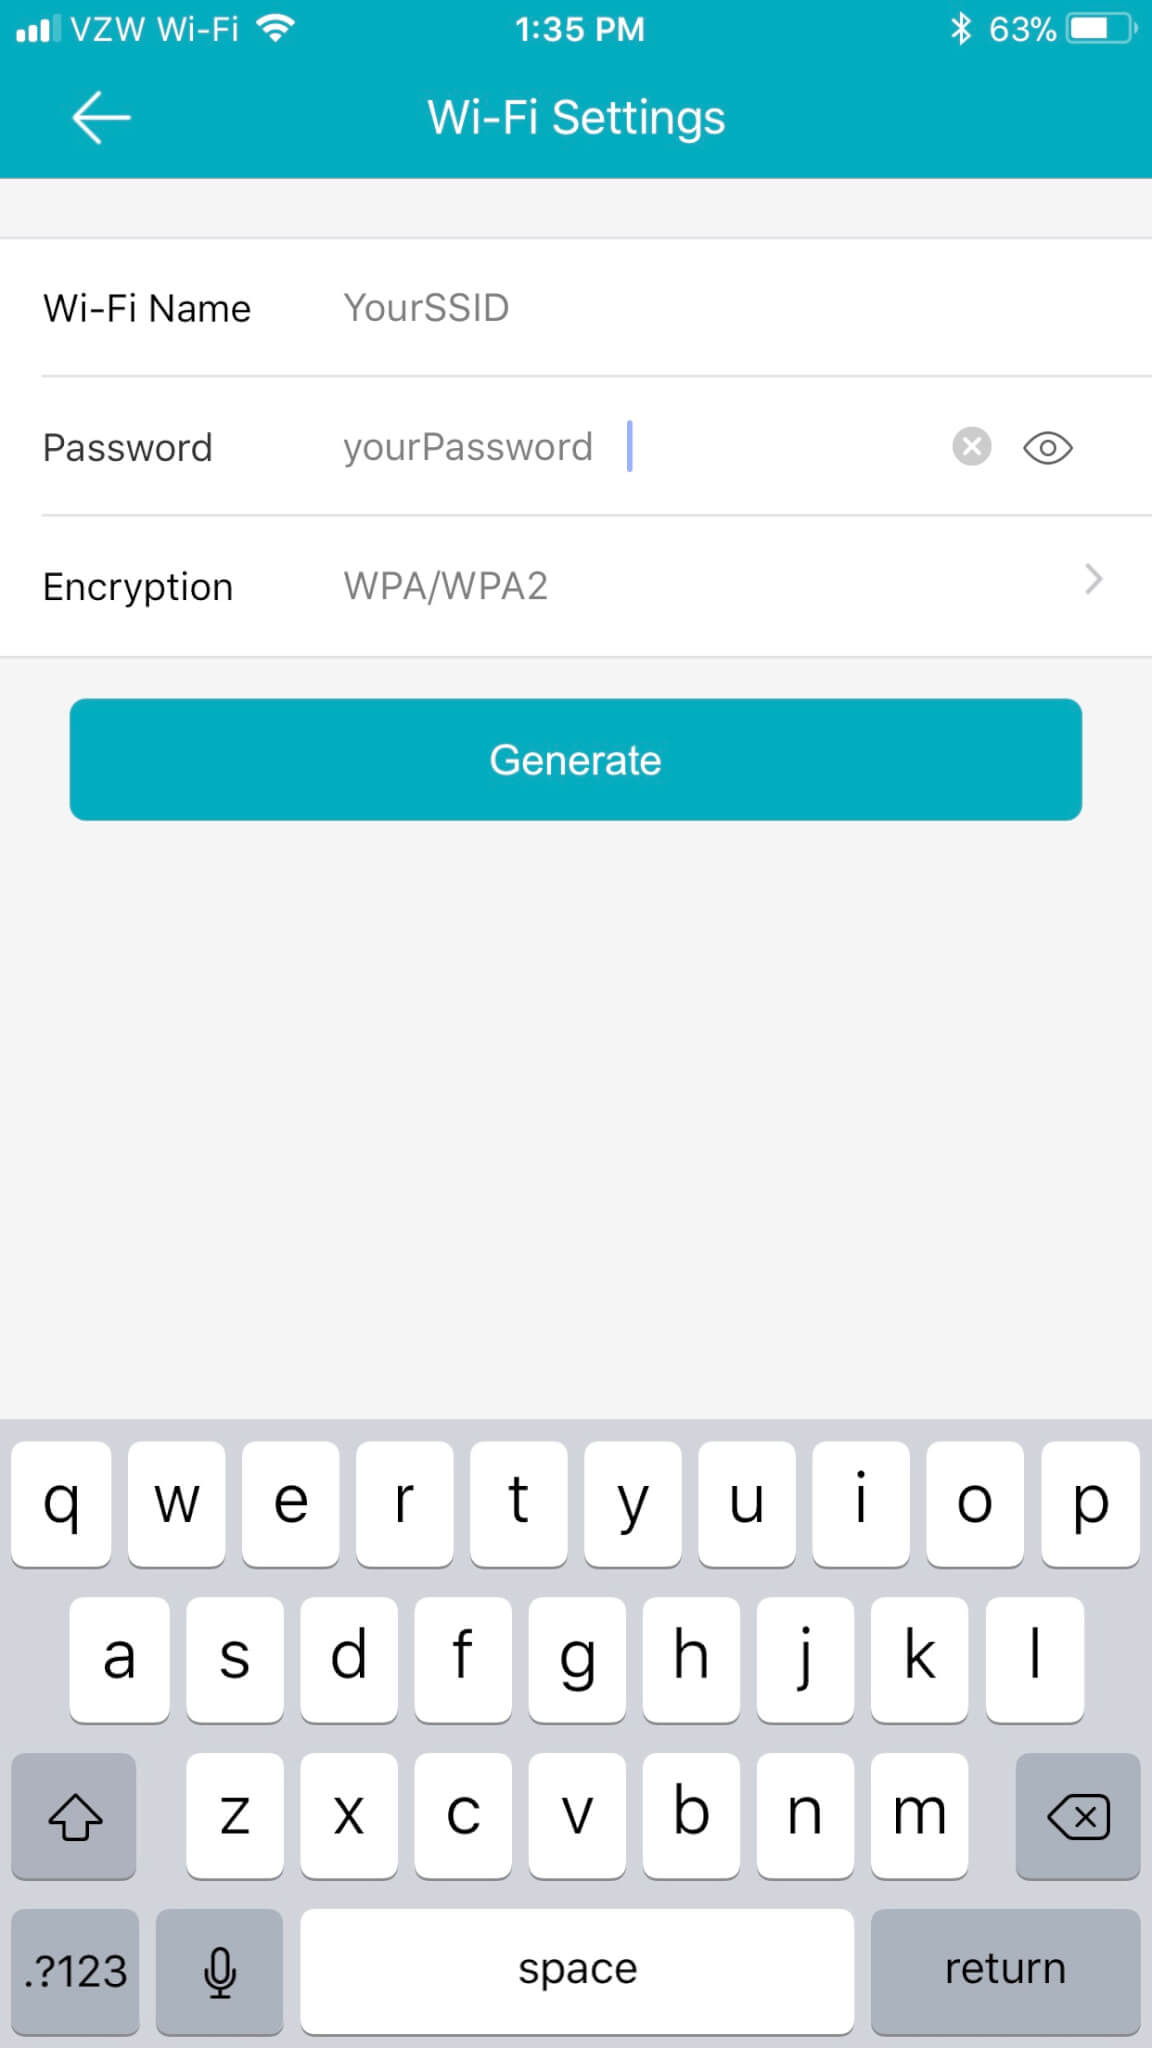

Show that QR code to the doorbell camera. You can tap on the QR code to make it bigger if needed. I have an iPhone 8+ and I had to hold it about 6 inches away. You may need to slowly move it slightly closer or further away to get it to read. Once the camera reads it, it will beep. After a few seconds, it will let you know whether or not it connected. If it didn’t connect, then try reversing the wires. You may also have a weak WiFi signal there and you may need to use a repeater if your router is too far away.
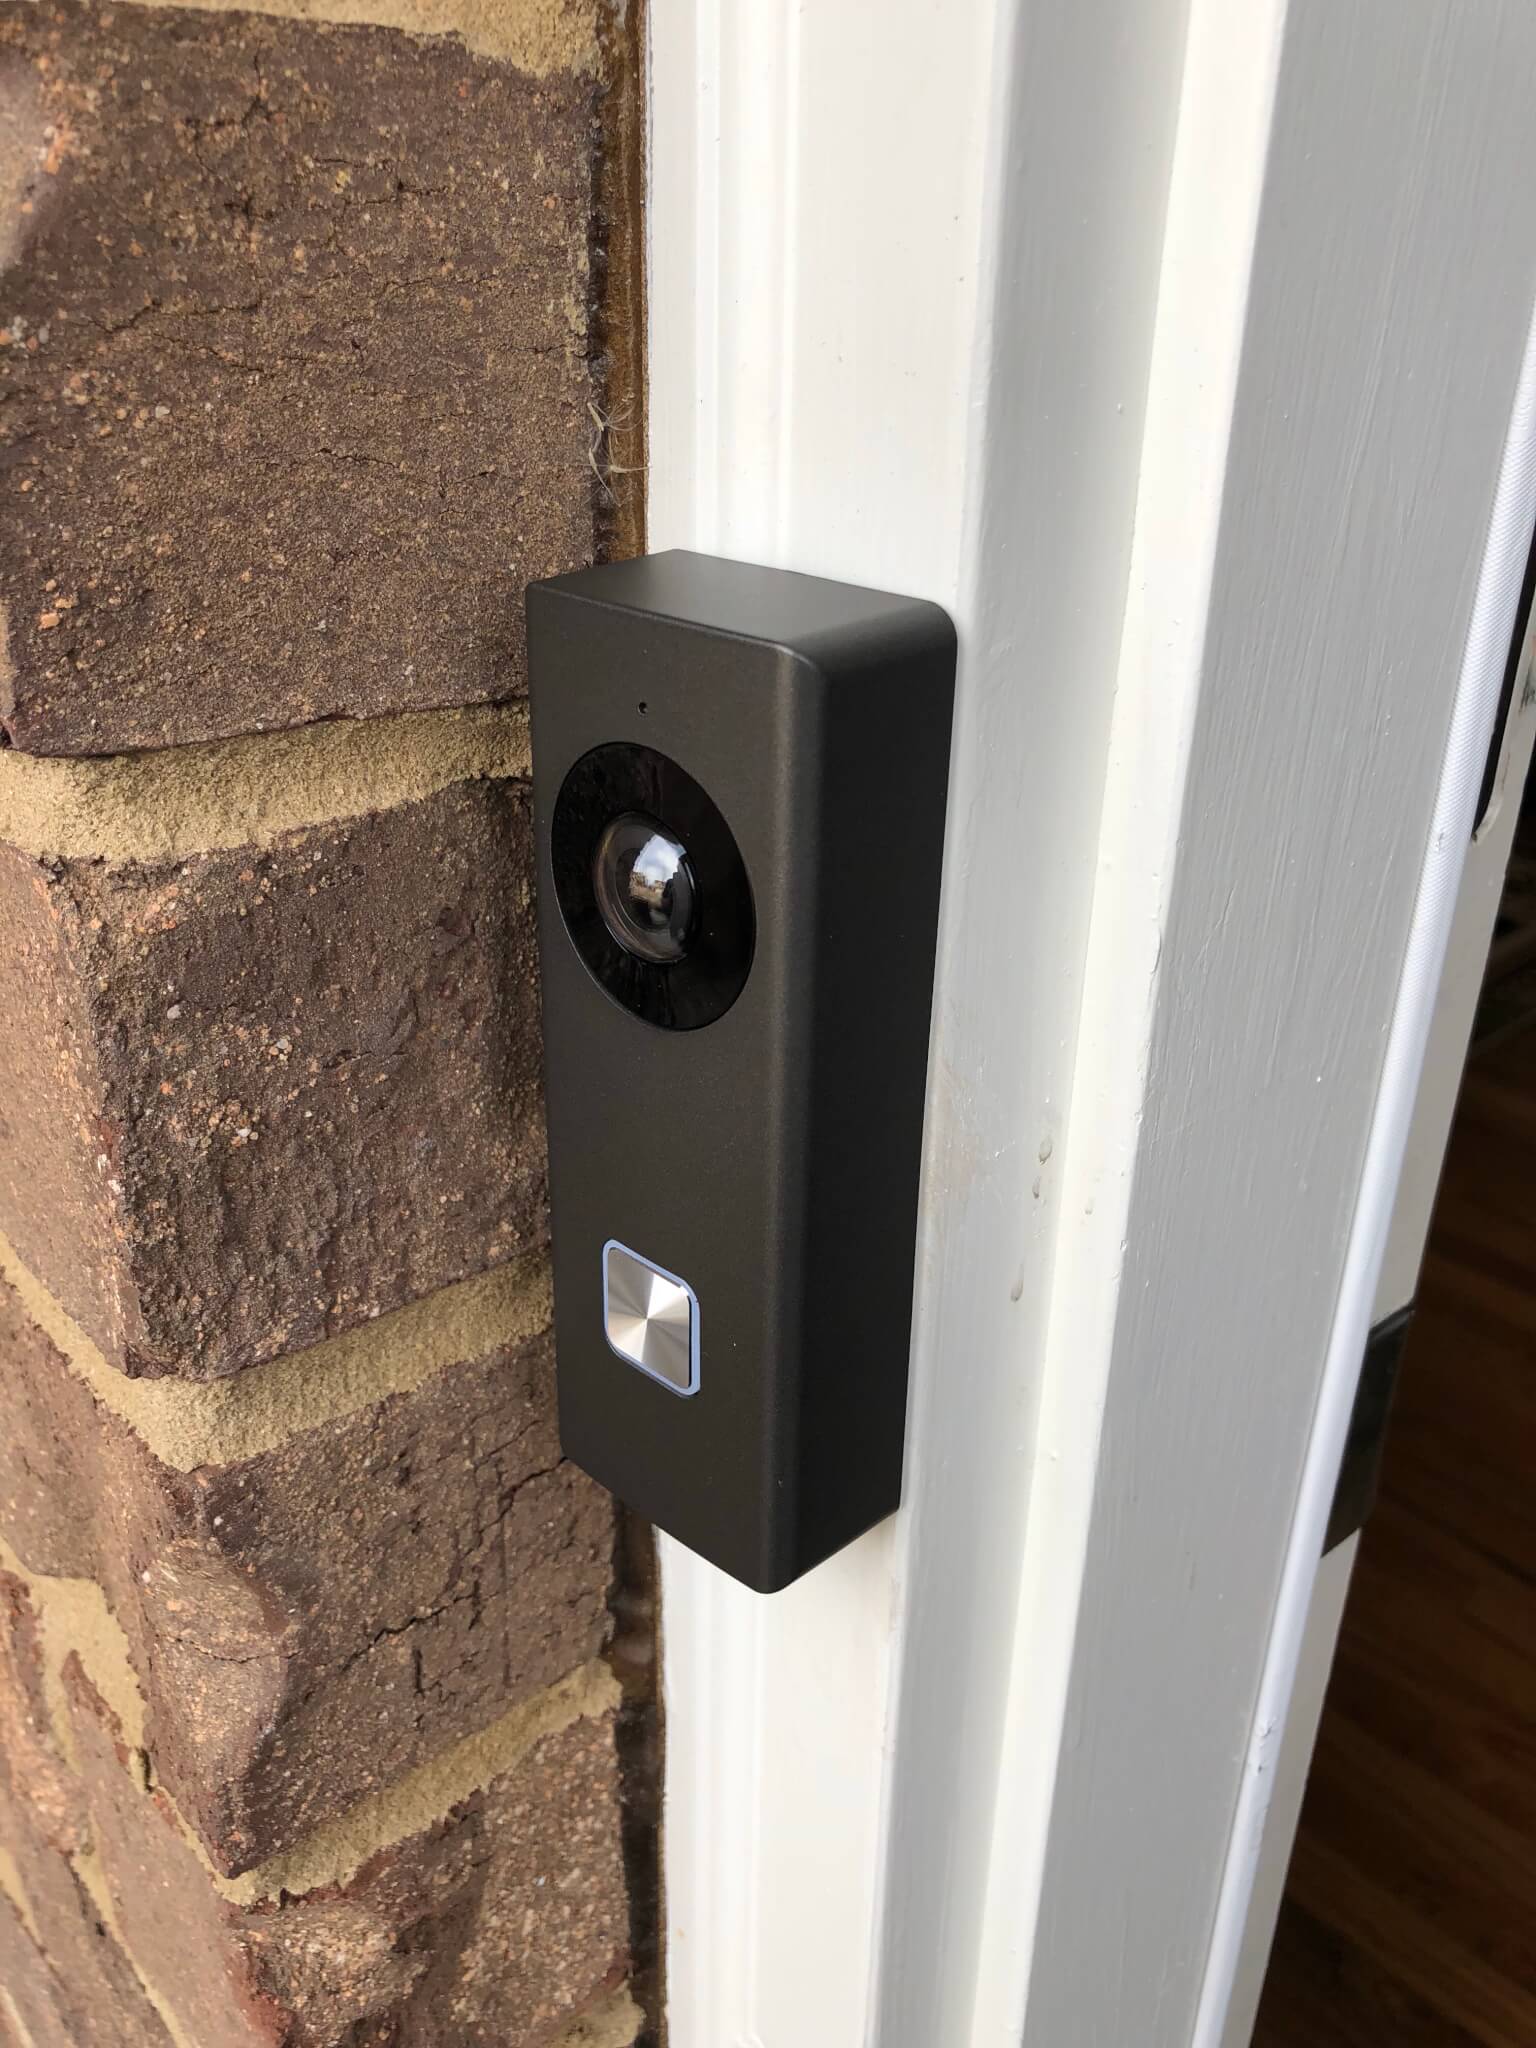
After you have it connected to the network, you can go ahead and screw it into the wall and put the faceplate on and screw the faceplate in at the bottom using the tool provided:
Once the doorbell is connected, you can add it into the app. The app will then ask you to set a password for it. This password will allow you to access the web interface where you can view the video through your computer’s web browser. The username would be ‘admin’. Check your router to find out what the IP address of the doorbell is.
If you want to add it to something like Blue Iris, iSpyConnect, or Ivideon, then you can use the following address: rtsp://ipaddress/mpeg4/ch01/main/av_stream
Once everything is setup, when someone rings the doorbell, it will actually show up on your phone like a phone call and you can have a 2 way call with them. The audio isn’t great, but I don’t really have any trouble understanding what is being said on either end. For the price, I’m impressed with what this thing can do. The video is pretty good as well. If there’s nothing in the way, you could probably see your whole front yard.
Possible Fix for Chime Buzz
If you are experiencing a buzzing sound then this fix might work. It worked for me at least. The buzzing happens because your smart doorbell draw a lot more current than your old dumb button. That current has to flow through the chime, and it creates a buzzing sound.
Your chime should have a terminal for the front door and the back door, with the common terminal in the middle. I would think that most people aren’t using the back door. If you are then I don’t think this will work for you but you can try. Just take a wire and connect the back door and front door terminals together. That should cause the doorbell camera current to be split between the front and back door chime circuits, basically reducing the current for the chime in half. That reduction can help eliminate the buzz. At least that’s what I think is happening.
Here’s a picture of the wire:

And as always, if you have any questions, feel free to ask.
Thanks for this write-up, I’ve been eyeing these for the past month because theoretically it’s exactly what I want.
Does it have a motion detection API that I can use in Home Assistant?
Home assistant can access the fees via rtsp.
What about recording video, you didn’t cover that at all. Quality, storage options, etc.
Yeah. For the quality, I just didn’t feel really comfortable putting a shot of my neighborhood out on the Internet. Hop you understand. And I didn’t use the microsd card yet either so I can’t really speak about that.
All I can say is that the video is good during the day and ok at night.
Can you use the app to check the feed any time? How wide angle is the lens?
Yes you can view live feed in the app. And the view angle is huge. Looks like 180. Maybe just a little less.
Does briding the front/back terminals in the chime not cause both the front and back door chime to ring? I’ve read that installing a resistor is also an option. Wondering about adverse side effects to either approach..
The chime sounds the same to me after I bridged it. Of course that might be something that depends on the chime itself. I don’t think it would hurt to try it. And I’m not sure about the resistor. I would have thought it wouldn’t make much of a difference.
Does it give feedback if you ring the doorbell and no one answers? Read something in regards of this on Amazon reviews. Can you disable the internal ringing if your kids are about to sleep etc?
Yes. It has a message if you don’t answer the call. My opinion on that at first was that I didn’t like it. But then I realized that the person knows you aren’t there when you don’t answer the door. At least this way they will realize that a notification was sent and that they are on camera.
And there is no way to disable the inside ringing, but you could probably do this fairly easily with an ESP8266 and a relay if you know a little about electronics and programming. A few of my other posts have some projects with the ESP8266/Wemos D1 Mini that might help.
I am having trouble adding this doorbell to my existing Blue Iris setup….. I am actually even having trouble getting into the web interface….
Do you have any idea what the initial password is when new, usually 1234, pass, password, pass 1234 or something similar….
I thought it setup the password when you add it using the app. And I think when you add it you have to include the username and password into BI.
So I bought this on Amazon as LaView brand.. LV-PDB1520F1
Documentation and Mobile app kind of sucks. The Webserver does not have FTP upload working.
It’s like it’s not quite enabled with this version of firmware. I can post screen shots.
Called their tech support and they said it wasn’t possible to use FTP.
Interested in reflashing to best supported firmware / app software.
What is your opinion make to flash and go with?
Thanks
Unfortunately I have only used the Melly version along with their firmware so I don’t really know which other ones are good. And I typically don’t use FTP for anything any more so I don’t know which firmwares have that, if any.
I don’t see a Uniden firmware on their site to reflash it to that brand..
Looks like LTS is one of the better brands that support this as for software. The app is newer w/ more features.
However, I can’t find firmware for it.
http://www.ltsecurityinc.com/downloads
Go there and search for 6128 under the product firmware section. And for other manufacutrers, you can usually go to their support page to find this stuff.
Nice, I have mine installed and working thanks to this write up. But having issues logging into the browser, do you know if this password is set up differently or if there is a default password I am unaware of?
I think that you setup the password when you first pair it with the app. Before that, there’s no password. You may want to try resetting to factory defaults.
Hi there,
Thanks for your article! Thanks to this info, I chose to buy the Uniden version of this camera and configure it with iSpy – works like a charm.
The only thing that I can’t seem to find is how to set the camera to use a static IP address. I looked around their HTML code, and it appears that there is a basic TCP/IP config tab commented out (http://x.x.x.x/doc/page/config/network/basicTcpIp.asp), but when removing the comments, it didn’t quite work.
Have you had any luck configuring a static IP address?
– M
I found my own answer. May help someone else.
Download the SADP utility from HikVision and use it to change the IP address of the camera.
https://www.hikvision.com/en/Support/Downloads/Tools
– M
Awesome. Glad to hear that. But, in my opinion, it’s best to just use your router to reserve the IP address so it will always give that same up address to it every tine. Much easier to manage that way. Most routers are able to do that.
Hey Simit,
So, in the end I had to follow your exact suggestion – a DHCP reservation on my router. The camera kept on losing the static IP address and reverted to DHCP. I thought it could be because of power outages but have been unable to correlate.
– M
How do you find the night vision? I currently have two, one is okay but the second (newer) has horrible lens flare from the IR making it nearly unusable at night. How have your experiences been?
The night vision was OK. It wasn’t great though.
That said, I actually just replaced it with a Ring. The Nelly is probably still your best option if you want local recording. But I got the $10 a month plan for the Ring Alarm which I wrote about a few weeks ago, so I figured I would just get the doorbell as well.
The Ring night vision is much better. The Nelly wasn’t bad though. But then I had a fairly early model. I don’t know if they made some changes on newer builds.
1. The reason for separate front and back door circuits is getting different sounding chimes depending on which button is pressed.
2. Connecting both in parallel effectively doubles the current draw, which is the exact opposite of your theory.
Whatever it does, it got rid of the buzz. Like I said, I wasn’t sure why it worked, and I was just guessing.