Creating a Speed Cube Timer Using an ESP32 with OLED
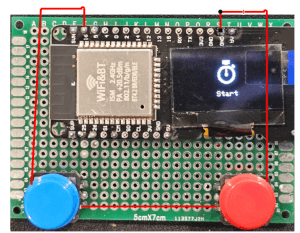
My son wanted a Rubiks Cube timer, and I told him we could make a really basic one in an hour. So I pulled out the ESP32 with the built in OLED and got a couple buttons to make one.
Home Automation with Home Assistant and ESP8266, 3D Printing, and other Technology

My son wanted a Rubiks Cube timer, and I told him we could make a really basic one in an hour. So I pulled out the ESP32 with the built in OLED and got a couple buttons to make one.

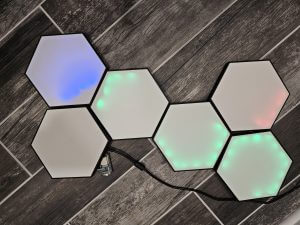
I wanted a way to be able to easily monitor my 6 3D printers. I thought about mounting a monitor, and just displaying a webpage, but I figured this would give me a much cleaner look on my wall. From the animation above, you can see that one printer is completely off(bottom left), one printer just completed a print, and the bed is about 3/4 of the way to fully cooled(top right), one printer is paused, likely due to filament running out(top left), and the other 3 are currently printing.

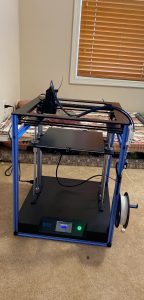
Note: This printer is pretty much the same as the Creativity Elf (AliExpress) and Sapphire Plus, so if you are searching for any details about this printer, searching for the Elf or Sapphire might be useful as well. I think there might be slight differences though. The frame is a different color, and the Coreception comes with LED lighting, which the ELF doesn’t appear to have.

In my last post about flashing a cheap LED controller, I mentioned that method is only really worth it if you already had the strip or the controller already laying around. However, if you wanted an LED strip project from scratch, I would highly recommend that you just create an addressable LED strip. It will cost almost the same, it is actually easier to do, and it will give you a lot more control over the strip. And I don't know if it is the strips that I got, but the color from the addressable strip seems be a lot nicer than the dumb strips from my last post. That could just be because the LEDs are closer together.

As I talked about in my last post about the FilaWeigher, I wanted to add MQTT and temperature/humidity(Using the BME280) to that project. Well, I've done that. Refer to the previous post for more details. But now for this one, I'm just going to focus on the updated code and schematics, and the Home Assistant integration via MQTT. I'm going to leave the old post up for the people that don't want MQTT or the BME280 sensor. This version also has JSON output of all the sensors which allows for OctoPrint integration(I actually just finished up that plugin and I'm going to be posting that up soon).

I created this project so I can know exactly how much filament is left on a spool for my 3D printer, an Ender 5 I wrote about previously. However, it can very well be used to weigh anything else. I put a few settings that are specific to the filament, but they don't have to be used.

So as someone that has a blog that mainly has posts that either relate to the ESP8266 or Home Assistant, I feel like I should have been using ESPHome a long time ago

The most recent project I decided to work on was a line following robot. However, as I was testing it to make sure the direction code was working, I decided to develop something that I can control from my smartphone. It turned out much better than I was expecting, so I figured I should make a blog post about it.

This is an update to my post about the Garage Door Notification which was based on my Wifi Garage Door Controller .About a week after my post about sending a repeating notification through Home Assistant, the developers created a new 'Alert' component that basically made my post obsolete. So I decided to switch over to the Alert component and add some extra features.

I've seen these games around, and I wanted to make my own. The object is simple. The metal wand has a loop with a long windy wire going through it, and the object is to get from one end of the wire to the other, without touching the wand to the wire. It automatically detects when the game is starting and when it ends, and records the last time and record time. It also displays this information on the OLED display and it buzzes when the wire is touched.