Using Tapo or Other RTSP Cameras as a Klipper Camera to Monitor Your 3D Printer
Here’s what you will need:
- Some sort of server that you can run Frigate on. I’m using a Beelink EQi12t, but I a Raspberry Pi would likely work as well, if you don’t have a ton of cameras. I’m also a fan of these N100 MiniPC’s. They usually only cost a little bit more than a Pi and are much more powerful.
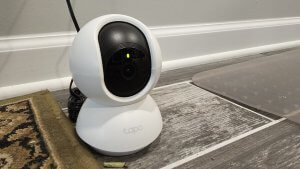
- Tapo, or other RTSP cameras. I personally have the C210, which is a pan/tilt camera that costs less than $20 each if you buy a pair of them. There is also the C110, which costs a tiny bit less, without the pan and tilt, and is a good bit smaller.
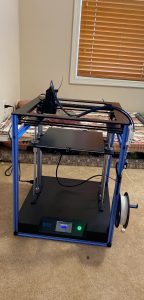
- A printer running Klipper firmware.
SETUP TAPO FOR RTSP/ONVIF
Here is a guide from TP-Link/Tapo. Just follow that and note down the username and password you used. Also, go into the camera settings -> Device Info and note down the IP address for that camera. You will need all this later.
INSTALL FRIGATE
The first step is to install Frigate. I’m not going into details on that as their documentation is better than what I can do. One thing you will need to add is - "1984:1984" into the ports section. That is the port that klipper/fluidd/mainsail will use to access the go2rtc/webrtc feed.
CONFIGURE FRIGATE
Go into the web interface of Frigate and click the gear icon at the bottom left -> Configuration Editor. I’m not sure why, but when I first set things up, I had to click on that Configuration Editor a few times for it to load. Remove any go2rtc: or cameras: configuration that is already there, and put in the following. Replace the placeholders for the Tapo camera username, password, IP address, and frigate IP address with the information you got earlier. Then click the save and restart button at the top right.
go2rtc: streams: camera1: - rtsp://<tapoCamUserName>:<tapoCamPassword>@<frigateIPaddress>/stream1 # this is the RTSP camera account set up in the app webrtc: candidates: - <frigateIPaddress>:8555 - stun:8555 cameras: camera1: ffmpeg: inputs: - path: rtsp://127.0.0.1:8554/camera1 # 127.0.0.1 is not a mistake input_args: preset-rtsp-restream-low-latencyonvif: # this is for pan/tilt but it only works inside frigate for now host: <TapoIPaddress> port: 2020 user: <tapoCamUserName> password: <tapoCamPassword> detect: enabled: false
