Tapo camera

Using Tapo or Other RTSP Cameras as a Klipper Camera to Monitor Your 3D Printer

Here’s what you will need:

  • Some sort of server that you can run Frigate on. I’m using a Beelink EQi12t, but I a Raspberry Pi would likely work as well, if you don’t have a ton of cameras. I’m also a fan of these N100 MiniPC’s. They usually only cost a little bit more than a Pi and are much more powerful.
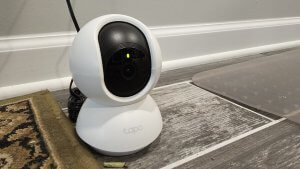
  • Tapo, or other RTSP cameras. I personally have the C210, which is a pan/tilt camera that costs less than $20 each if you buy a pair of them. There is also the C110, which costs a tiny bit less, without the pan and tilt, and is a good bit smaller.
  • A printer running Klipper firmware.

SETUP TAPO FOR RTSP/ONVIF

Here is a guide from TP-Link/Tapo. Just follow that and note down the username and password you used. Also, go into the camera settings -> Device Info and note down the IP address for that camera. You will need all this later.

INSTALL FRIGATE

The first step is to install Frigate. I’m not going into details on that as their documentation is better than what I can do. One thing you will need to add is - "1984:1984" into the ports section. That is the port that klipper/fluidd/mainsail will use to access the go2rtc/webrtc feed.

CONFIGURE FRIGATE

Go into the web interface of Frigate and click the gear icon at the bottom left -> Configuration Editor. I’m not sure why, but when I first set things up, I had to click on that Configuration Editor a few times for it to load. Remove any go2rtc: or cameras: configuration that is already there, and put in the following. Replace the placeholders for the Tapo camera username, password, IP address, and frigate IP address with the information you got earlier. Then click the save and restart button at the top right.

go2rtc: streams: camera1: - rtsp://<tapoCamUserName>:<tapoCamPassword>@<frigateIPaddress>/stream1 # this is the RTSP camera account set up in the app webrtc: candidates: - <frigateIPaddress>:8555 - stun:8555 cameras: camera1: ffmpeg: inputs: - path: rtsp://127.0.0.1:8554/camera1 # 127.0.0.1 is not a mistake input_args: preset-rtsp-restream-low-latencyonvif: # this is for pan/tilt but it only works inside frigate for now host: <TapoIPaddress> port: 2020 user: <tapoCamUserName> password: <tapoCamPassword> detect: enabled: false Read more...

Using the WyzeCam as a Webcam for Your Computer or OctoPrint

So if you are looking for a webcam right now (I am writing this article during the COVID-19 pandemic), then you might discover that you are literally going to spend about 3 times the normal price. The Logitech C920 costs $200 right now, and the popular budget C270 will cost you $100.

You can currently get popular WiFi WyzeCam for around $25. And even the pan/tilt version for $35. However, those cams are WiFi only, and won't work out the box with your computer as a webcam for video conferencing(or for OctoPrint, which is what I plan on using it for). However, Wyze recently released a special firmware that allows that function.

Automatically Upload Your Time Lapse videos From OctoPrint to Youtube

For a few months now, I've been looking for a way to upload videos from OctoPrint (This link is to my previous write-up on OctoPrint and its plugins. Please check it out.) to YouTube automatically. I was optimistic when I learned about the OctoPrint-Dropbox-Timelapse plugin, and Zapier, I was optimistic that they would be able to do what I wanted. However, I was not able to get it working. But the OctoPrint-Dropbox plugin had a recent update, and all of a sudden, it all just started working. So I figured there might be others that wanted this, so i did a write-up on it.

Using a Kindle Fire as a Touch Screen Home Control Panel

Recently, Amazon was selling the refurbished Fire 7 tablet for less than $40. The new one runs for juts $10 more. So I figured I would order it and see if it would be an option. After spending an hour with it, I felt confident that I can make it work. I’ve been running it for a couple weeks at the time of writing, and it’s been awesome.

Installing the Ring Pro Doorbell/Mini Review

I wrote about the Nelly WiFi Doorbell a little over a year ago. At first, I was pretty happy with it. But after a while, it needed to be reset a couple time and it would need a reboot every couple of weeks. It was just a pain to look after it. It’s probably still one of the best options if you require local recording. In my case, I would love to have local recording, but not with this much hassle. I suspect that there’s a chance that the issues may have been the fact that the transformer was 10VA, and that it may have need a little more juice. But I couldn’t find any details as to what it required. I didn’t feel like experimenting with it, so I decided to go with the Ring Pro. Read more...

Installing the Nelly Security WiFi Video Doorbell

Ever since Ring released their video doorbell a few years ago, I've been waiting for a WiFi video doorbell that didn't rely on the cloud (and a monthly fee), was powered by hard wire, and still looked decent. I've only had it for a few days, but I think that the Nelly Security doorbell accomplishes this. Unfortunately, it looks like the Nelly version is out of stock at the time of writing, but this doorbell has been rebranded by a bunch of other companies, one of which is Nelly.