Tapo camera

Using Tapo or Other RTSP Cameras as a Klipper Camera to Monitor Your 3D Printer

Here’s what you will need:

  • Some sort of server that you can run Frigate on. I’m using a Beelink EQi12t, but I a Raspberry Pi would likely work as well, if you don’t have a ton of cameras. I’m also a fan of these N100 MiniPC’s. They usually only cost a little bit more than a Pi and are much more powerful.
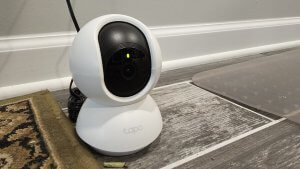
  • Tapo, or other RTSP cameras. I personally have the C210, which is a pan/tilt camera that costs less than $20 each if you buy a pair of them. There is also the C110, which costs a tiny bit less, without the pan and tilt, and is a good bit smaller.
  • A printer running Klipper firmware.

SETUP TAPO FOR RTSP/ONVIF

Here is a guide from TP-Link/Tapo. Just follow that and note down the username and password you used. Also, go into the camera settings -> Device Info and note down the IP address for that camera. You will need all this later.

INSTALL FRIGATE

The first step is to install Frigate. I’m not going into details on that as their documentation is better than what I can do. One thing you will need to add is - "1984:1984" into the ports section. That is the port that klipper/fluidd/mainsail will use to access the go2rtc/webrtc feed.

CONFIGURE FRIGATE

Go into the web interface of Frigate and click the gear icon at the bottom left -> Configuration Editor. I’m not sure why, but when I first set things up, I had to click on that Configuration Editor a few times for it to load. Remove any go2rtc: or cameras: configuration that is already there, and put in the following. Replace the placeholders for the Tapo camera username, password, IP address, and frigate IP address with the information you got earlier. Then click the save and restart button at the top right.

go2rtc: streams: camera1: - rtsp://<tapoCamUserName>:<tapoCamPassword>@<frigateIPaddress>/stream1 # this is the RTSP camera account set up in the app webrtc: candidates: - <frigateIPaddress>:8555 - stun:8555 cameras: camera1: ffmpeg: inputs: - path: rtsp://127.0.0.1:8554/camera1 # 127.0.0.1 is not a mistake input_args: preset-rtsp-restream-low-latencyonvif: # this is for pan/tilt but it only works inside frigate for now host: <TapoIPaddress> port: 2020 user: <tapoCamUserName> password: <tapoCamPassword> detect: enabled: false Read more...
Magic Phoenix Voron 2.4 Build Log – My second Voron 2.4 350 3D Printer vs my Formbot

Update: It looks like the latest Formbot kit does come with a BTT Pi, and Stealthburner. That’s good, but it’s still lacking CANBUS and TAP, and you have to get your own 3d printed parts and still costs more.

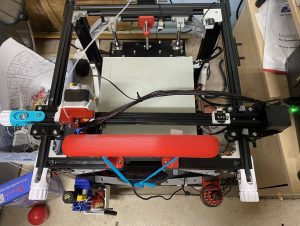
This is my Magic Phoenix Voron 2.4 Build Log, which will be my 7th 3D printer. I started with a Creality Ender 5, and then got 4 Corexy printers, which were all Creativity Elf, and then I got the Voron 2.4 R2 from Formbot. These Vorons will start replacing the Elf printers. The Formbot kit has been great, except for the constant breaking of wires in the cable chains, which is why I switched that one to umbilical. Read more...

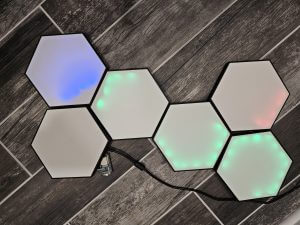
Using WLED and Home Assistant to Monitor 3D Printers via Moonraker/Klipper

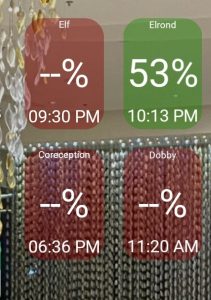
I wanted a way to be able to easily monitor my 6 3D printers. I thought about mounting a monitor, and just displaying a webpage, but I figured this would give me a much cleaner look on my wall. From the animation above, you can see that one printer is completely off(bottom left), one printer just completed a print, and the bed is about 3/4 of the way to fully cooled(top right), one printer is paused, likely due to filament running out(top left), and the other 3 are currently printing.

Create an Android Widget for Moonraker / Klipper to See Your 3D Printer Status on Your Home Screen

It’s been a while since I have posted, but someone on Reddit asked me about my Android widget that shows information from my 3D printers. This will be a quick write up to point you in the right direction, so I won’t have step by step instructions. Keep in mind that this only works when your phone can actually connect to Moonraker. So if you are away from home, it won’t work unless you have a VPN. Read more...

Get a Notification When an Etsy Listing Has Low Inventory


So I started an Etsy shop selling 3D prints of my designs almost a year ago,  and there have been times when an item runs out of stock on Etsy. When that happens, the item becomes unlisted until I update the inventory. As far as I can tell, and after asking around, there doesn’t seem to be a way to have Etsy notify me when that happens and it’s a hassle to go in and update the inventory with every batch I print. I also thought about setting the inventory to a really high number, but then I don’t want to end up in a situation where I get a ton of orders all at once and can’t keep up. Read more...

Adding a Pause in Cura to Embed an Object Into a 3D Print

I recently saw this on Amazon and figured I could print that. I’ve also been wondering about embedding an object into the middle of a 3D print, so I figured this would be a good project. So I bought these blades, and measured them, and started working in Fusion 360. In hindsight, I think that some jigsaw blades would have been easier when modeling since there aren’t any weird angles to deal with. Either way, it wasn’t too difficult. Read more...

Sainsmart Coreception – Getting Started and Mini Review

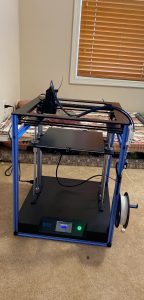
Note: This printer is pretty much the same as the Creativity Elf (AliExpress) and Sapphire Plus, so if you are searching for any details about this printer, searching for the Elf or Sapphire might be useful as well. I think there might be slight differences though. The frame is a different color, and the Coreception comes with LED lighting, which the ELF doesn’t appear to have. Read more...

Replacing a 3-Way Switch with a TP-Link HS-210 3-Way Smart Switch

I wasn’t planning on writing a post on this, but after I spent 4 hours wrapping my head around this and getting it working, I’m hoping this information might be able to help someone else. A while ago, I purchased this TP-Link 3-Way Smart Switch 2-Pack. I purchased them because the TP-Link stuff seems to be reliable, inexpensive, and it works with HomeAssistant. As an added bonus, you CAN use the smart switch on only one side of the circuit, and keep a dumb switch on the other side. You can turn the light on from either end, and the TP-Link will always show the correct status of the light. This allows you to make your 3-way switches smart for a good price since it always comes with a pair of 3-way switches. I wanted to be able to have the light turn on automatically using the Wyze Sense door sensor and a routine via Alexa. Read more...